For any 1500 customers, wired probing/tool setting is now available with 2.14.0.
Couple notes:
The same connector is used, you will need an adapter cable (PN 54753). The adapter ends in M12 connectors, not DIN connectors. The shipment of the adapters will arrive next week.
It’s either wireless or wired, you can’t mix a wireless probe with wired tool setter.
There’s a behavior change with wired probes/tool setters, Pathpilot will not recognize the signal from them if you just plug it in. You must command M44 (probe)/M46 (ETS) for the signals to be recognized and M45/M47 to turn them off. Those commands are automatically part of T99/G37.
Thanks so much for the heads up! That is great news! I currently have a few $$ investmented in a Centroid probe and TT I would like to put to use. Can you please provide the pin out information for this M12 connector. Lastly, can you confirm what voltage Path Pilot uses for the control voltage and if the Tormach probes/tool setters are normally open or normally closed?
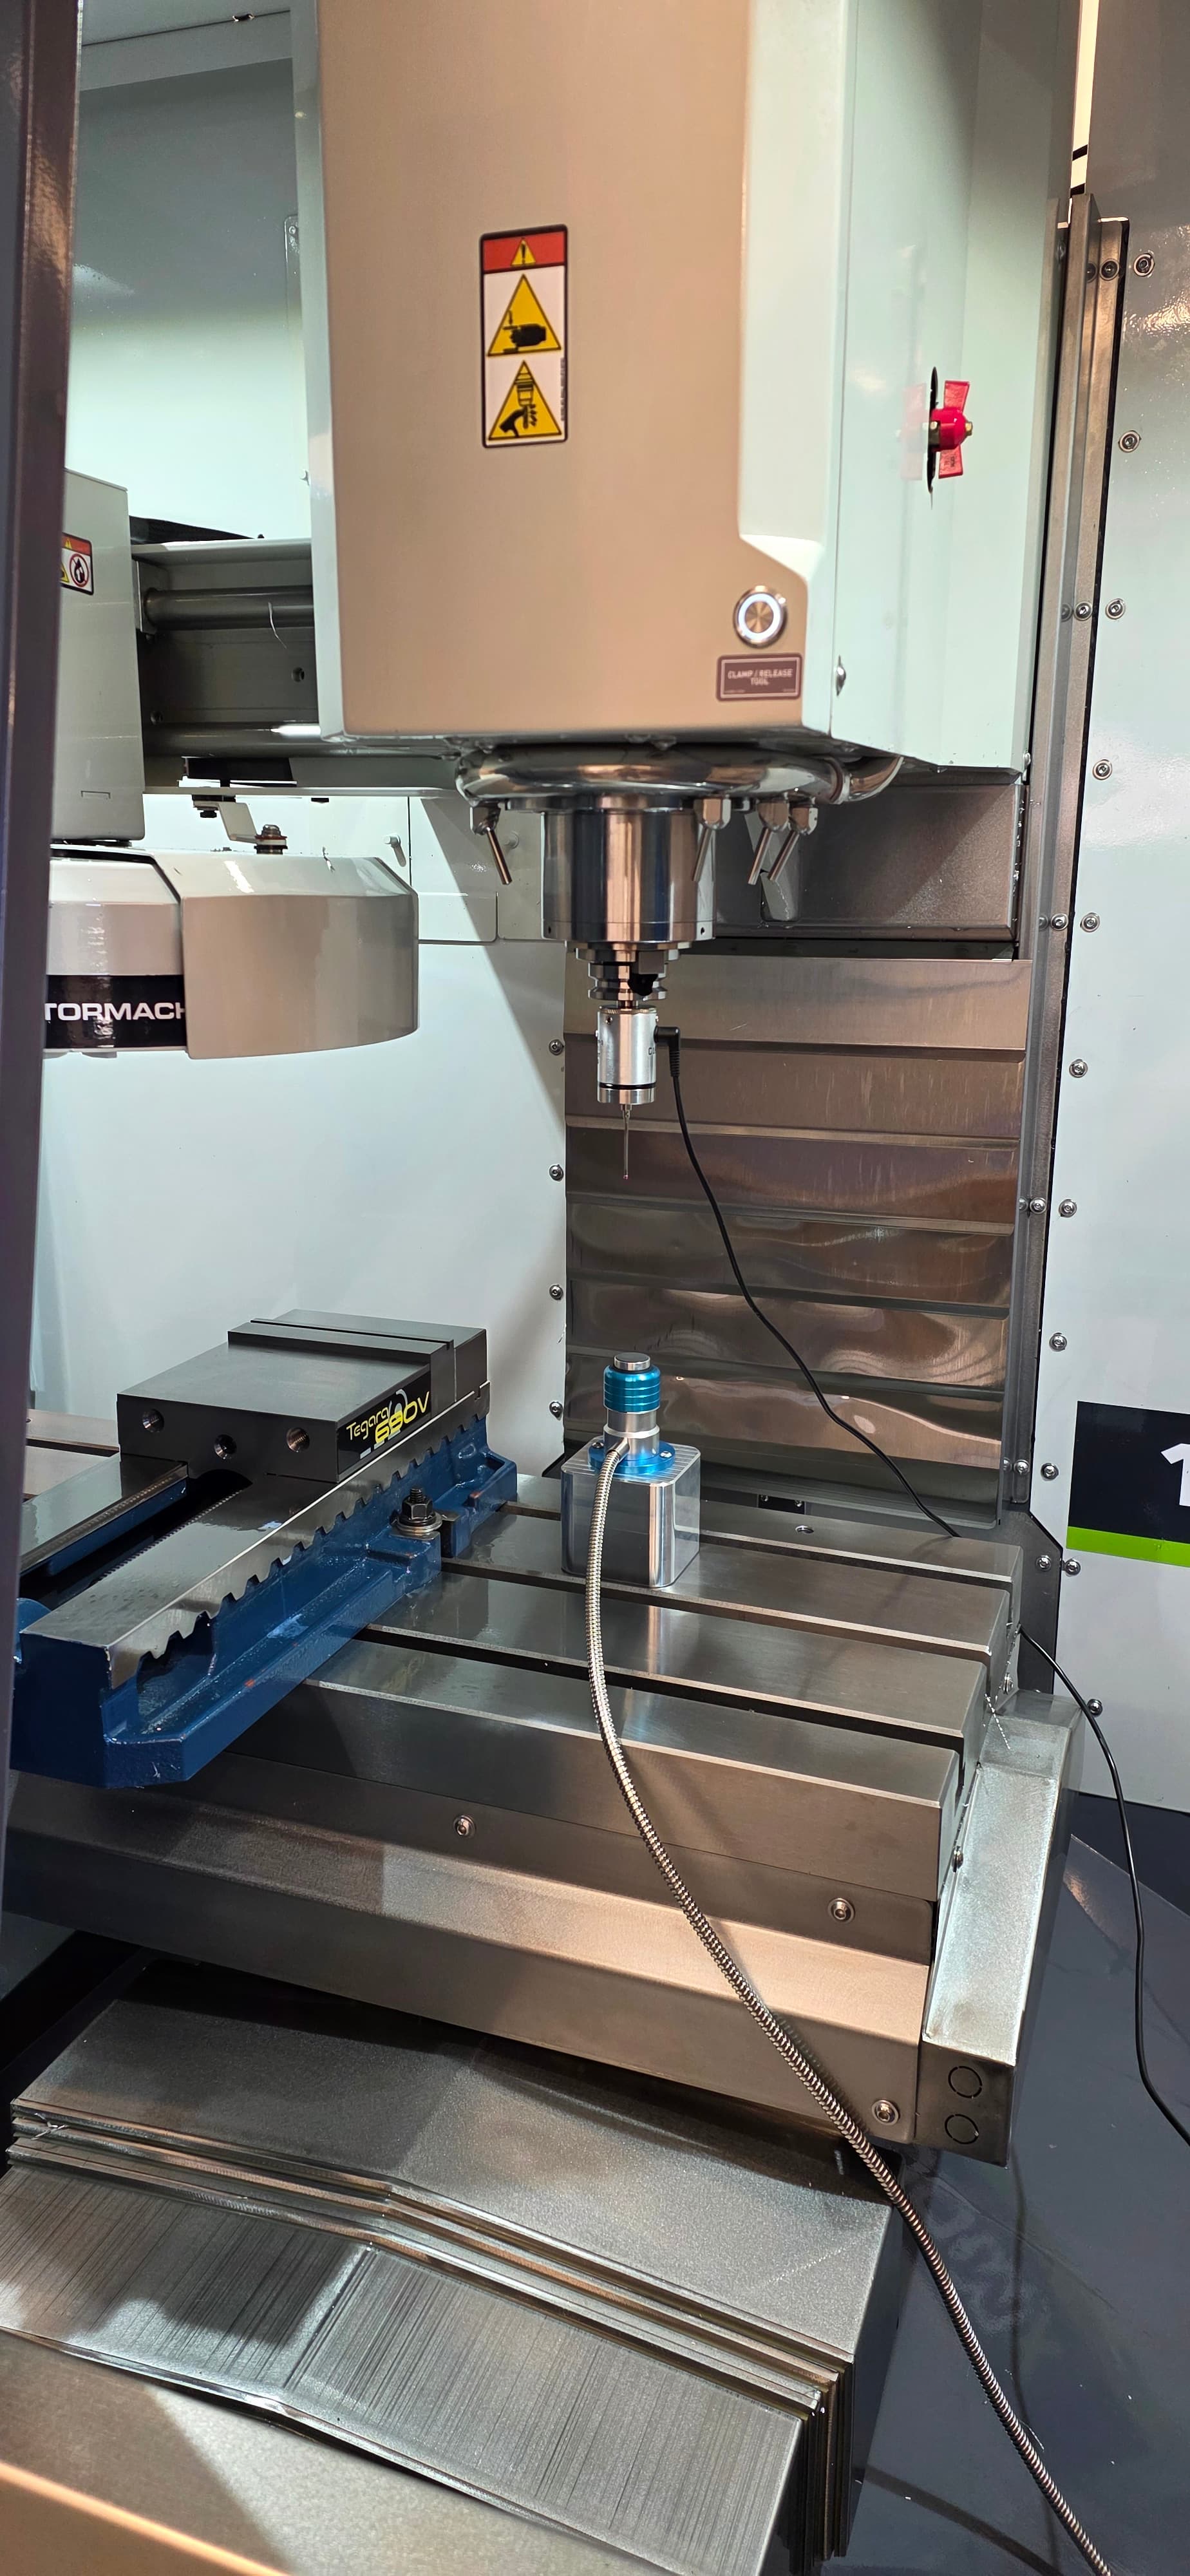
For anyone else wishing to use a wired probe and tool setter, I hope this helps. The schematic below is specific to an inexpensive amazon tool setter and Centroid KP3 probe, but any probe and TT that uses a normally closed circuit should work. The Tormach TT and Passive probe will work great. The only caveat I can think of is that if your probe has an LED light that lights when it is triggered, you may have to add a pull up/down resistor to make the input recognize the signal. I don’t think this will be necessary as I did not and most small LED’s pull around the same current.
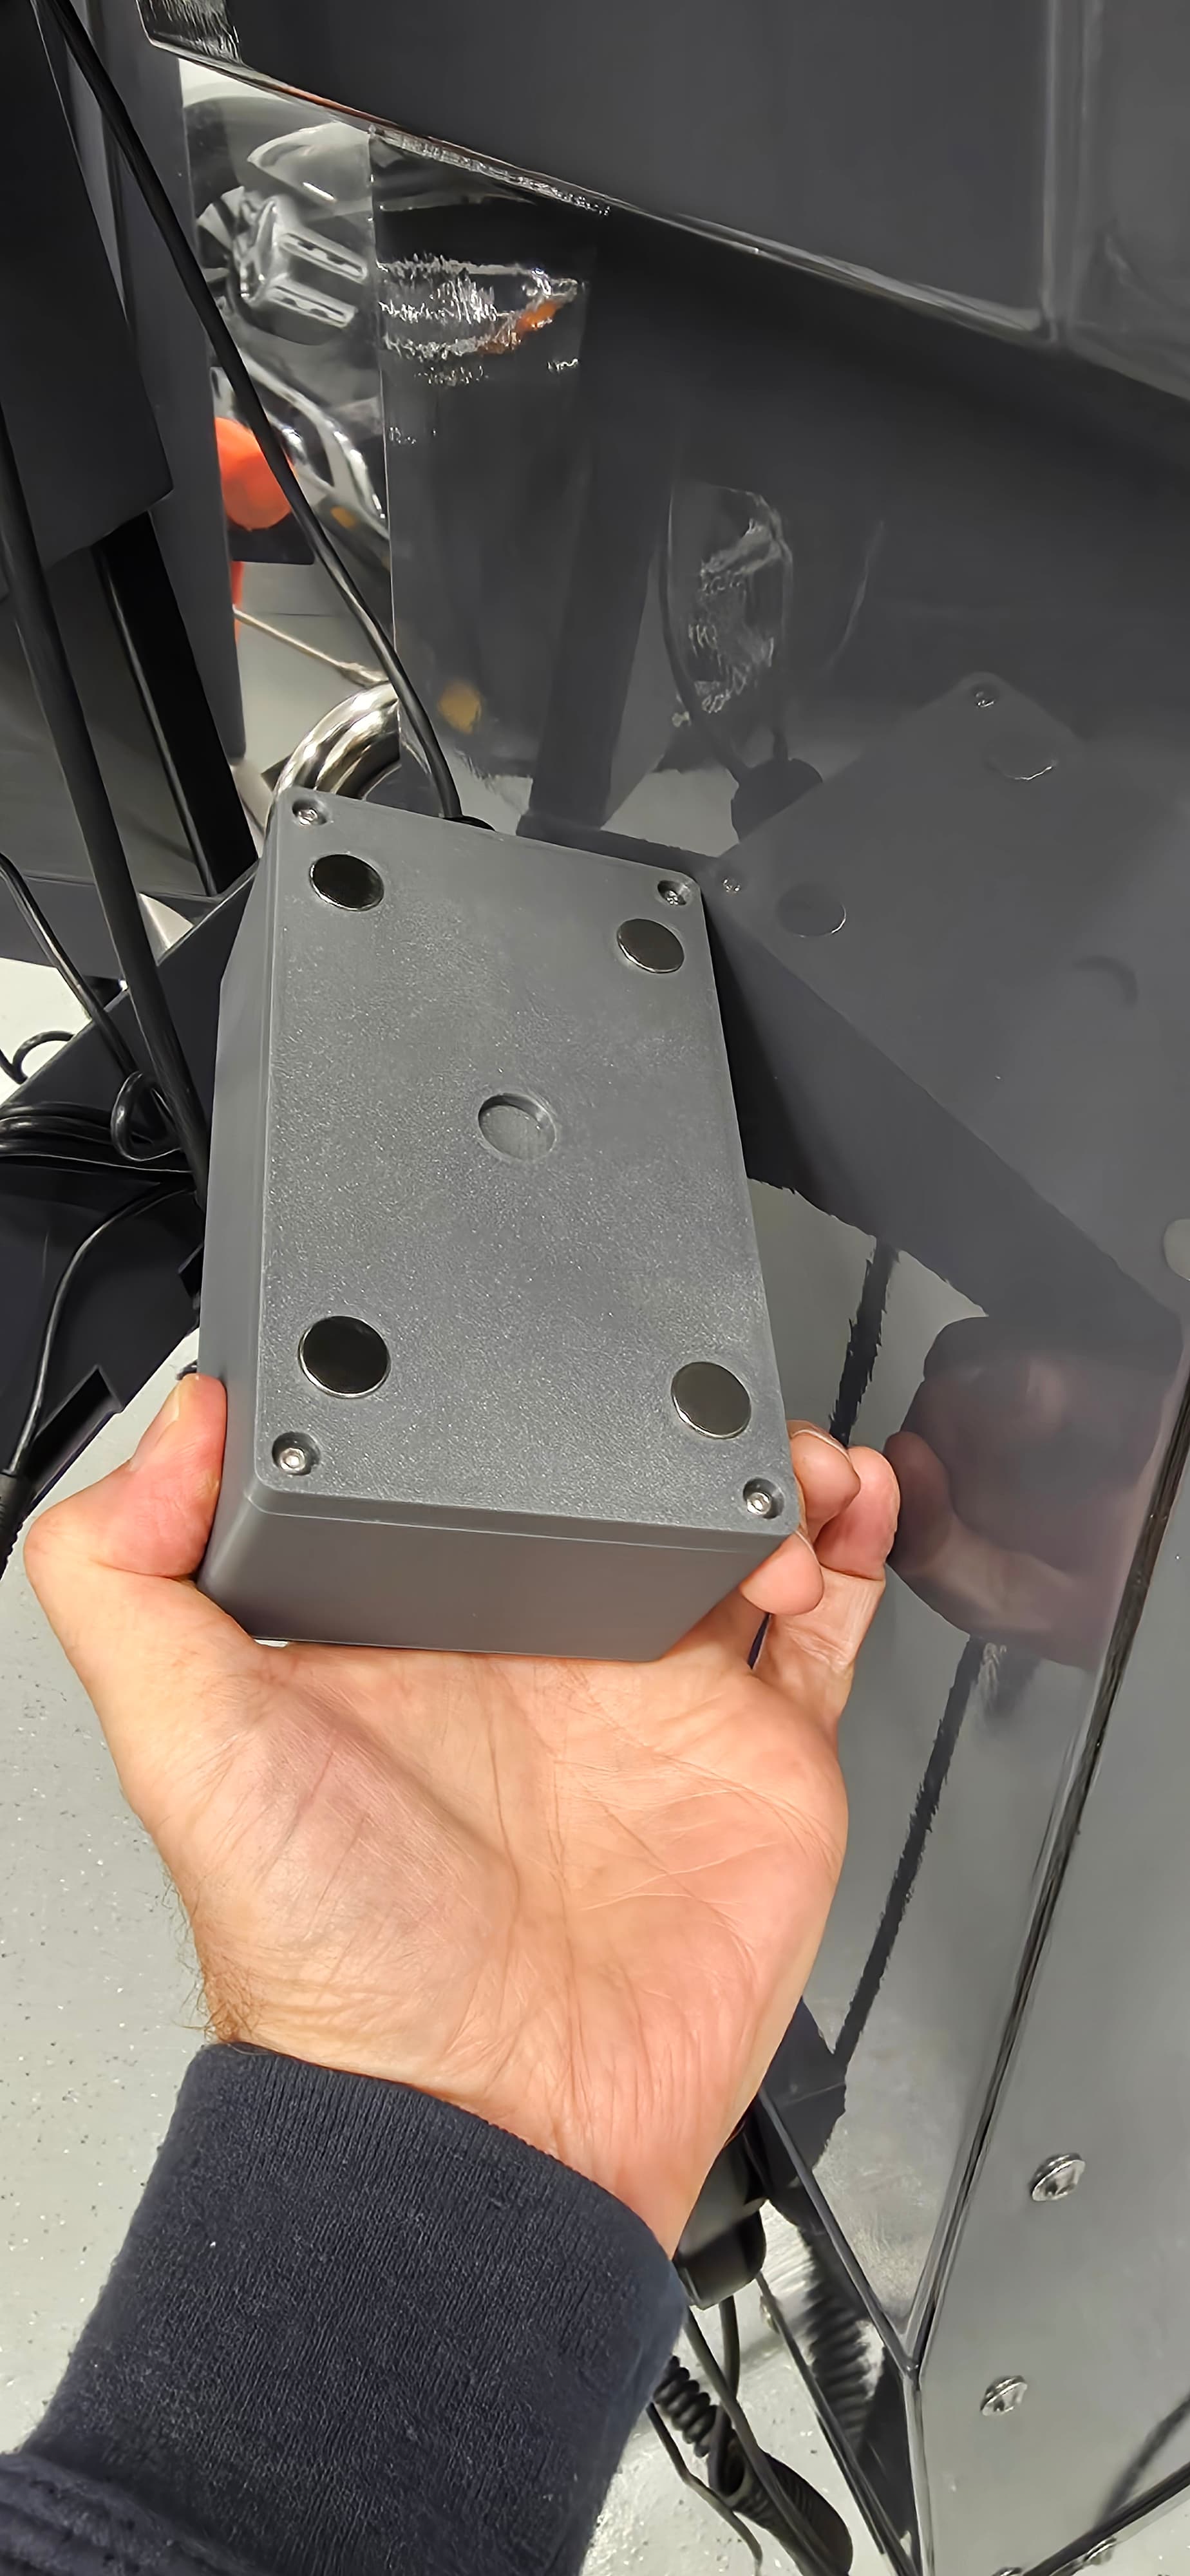
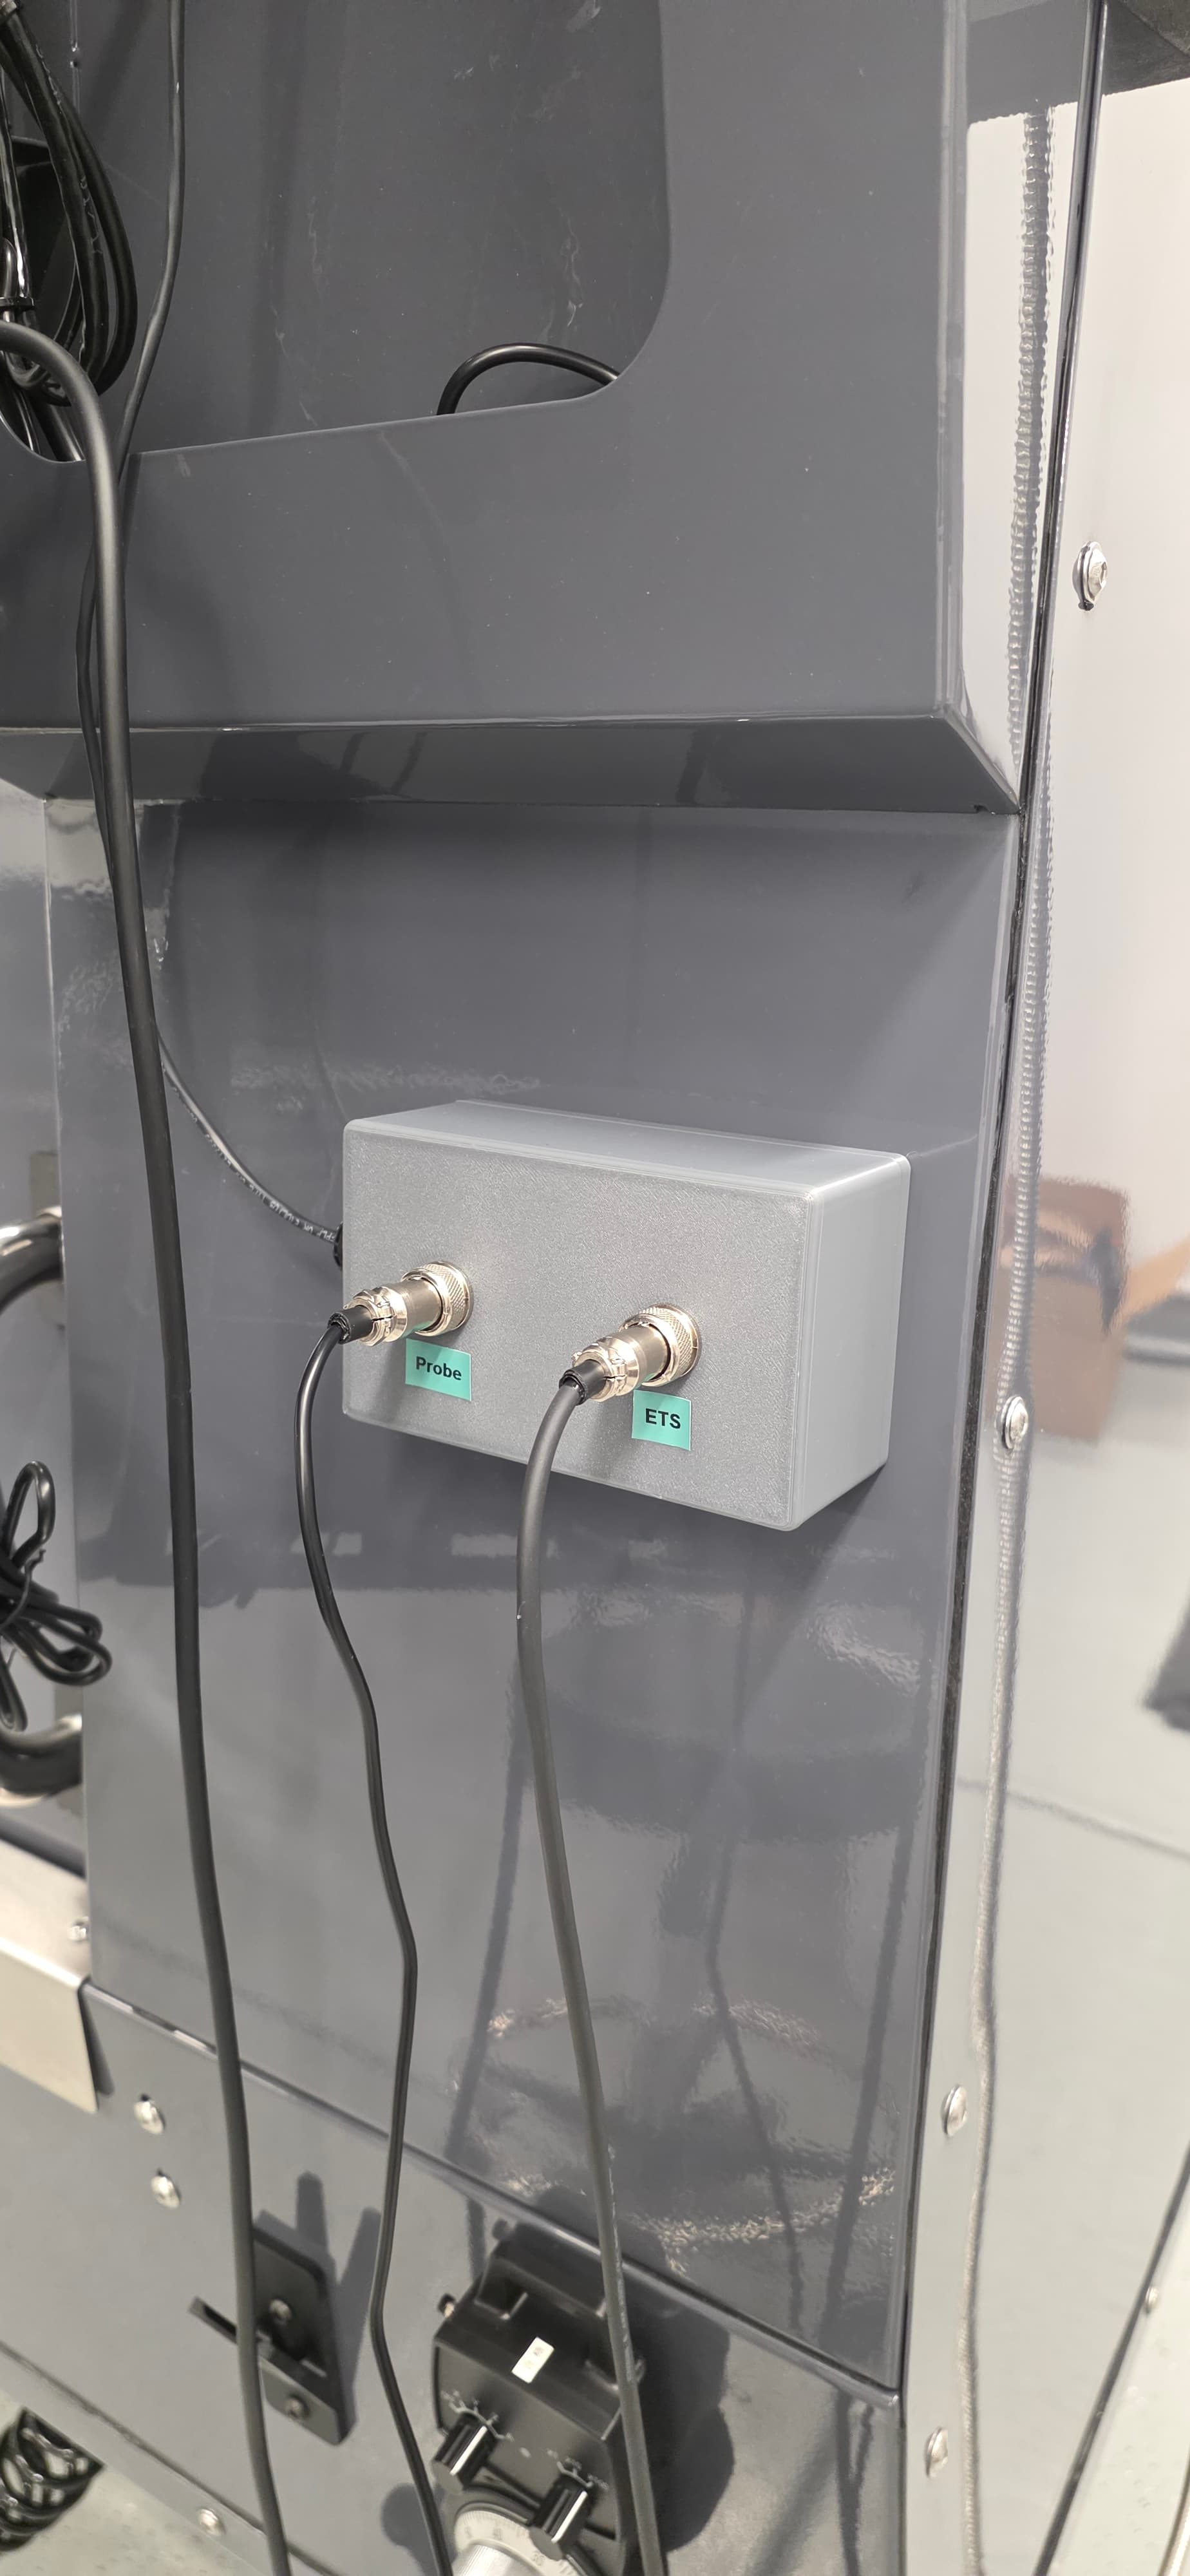
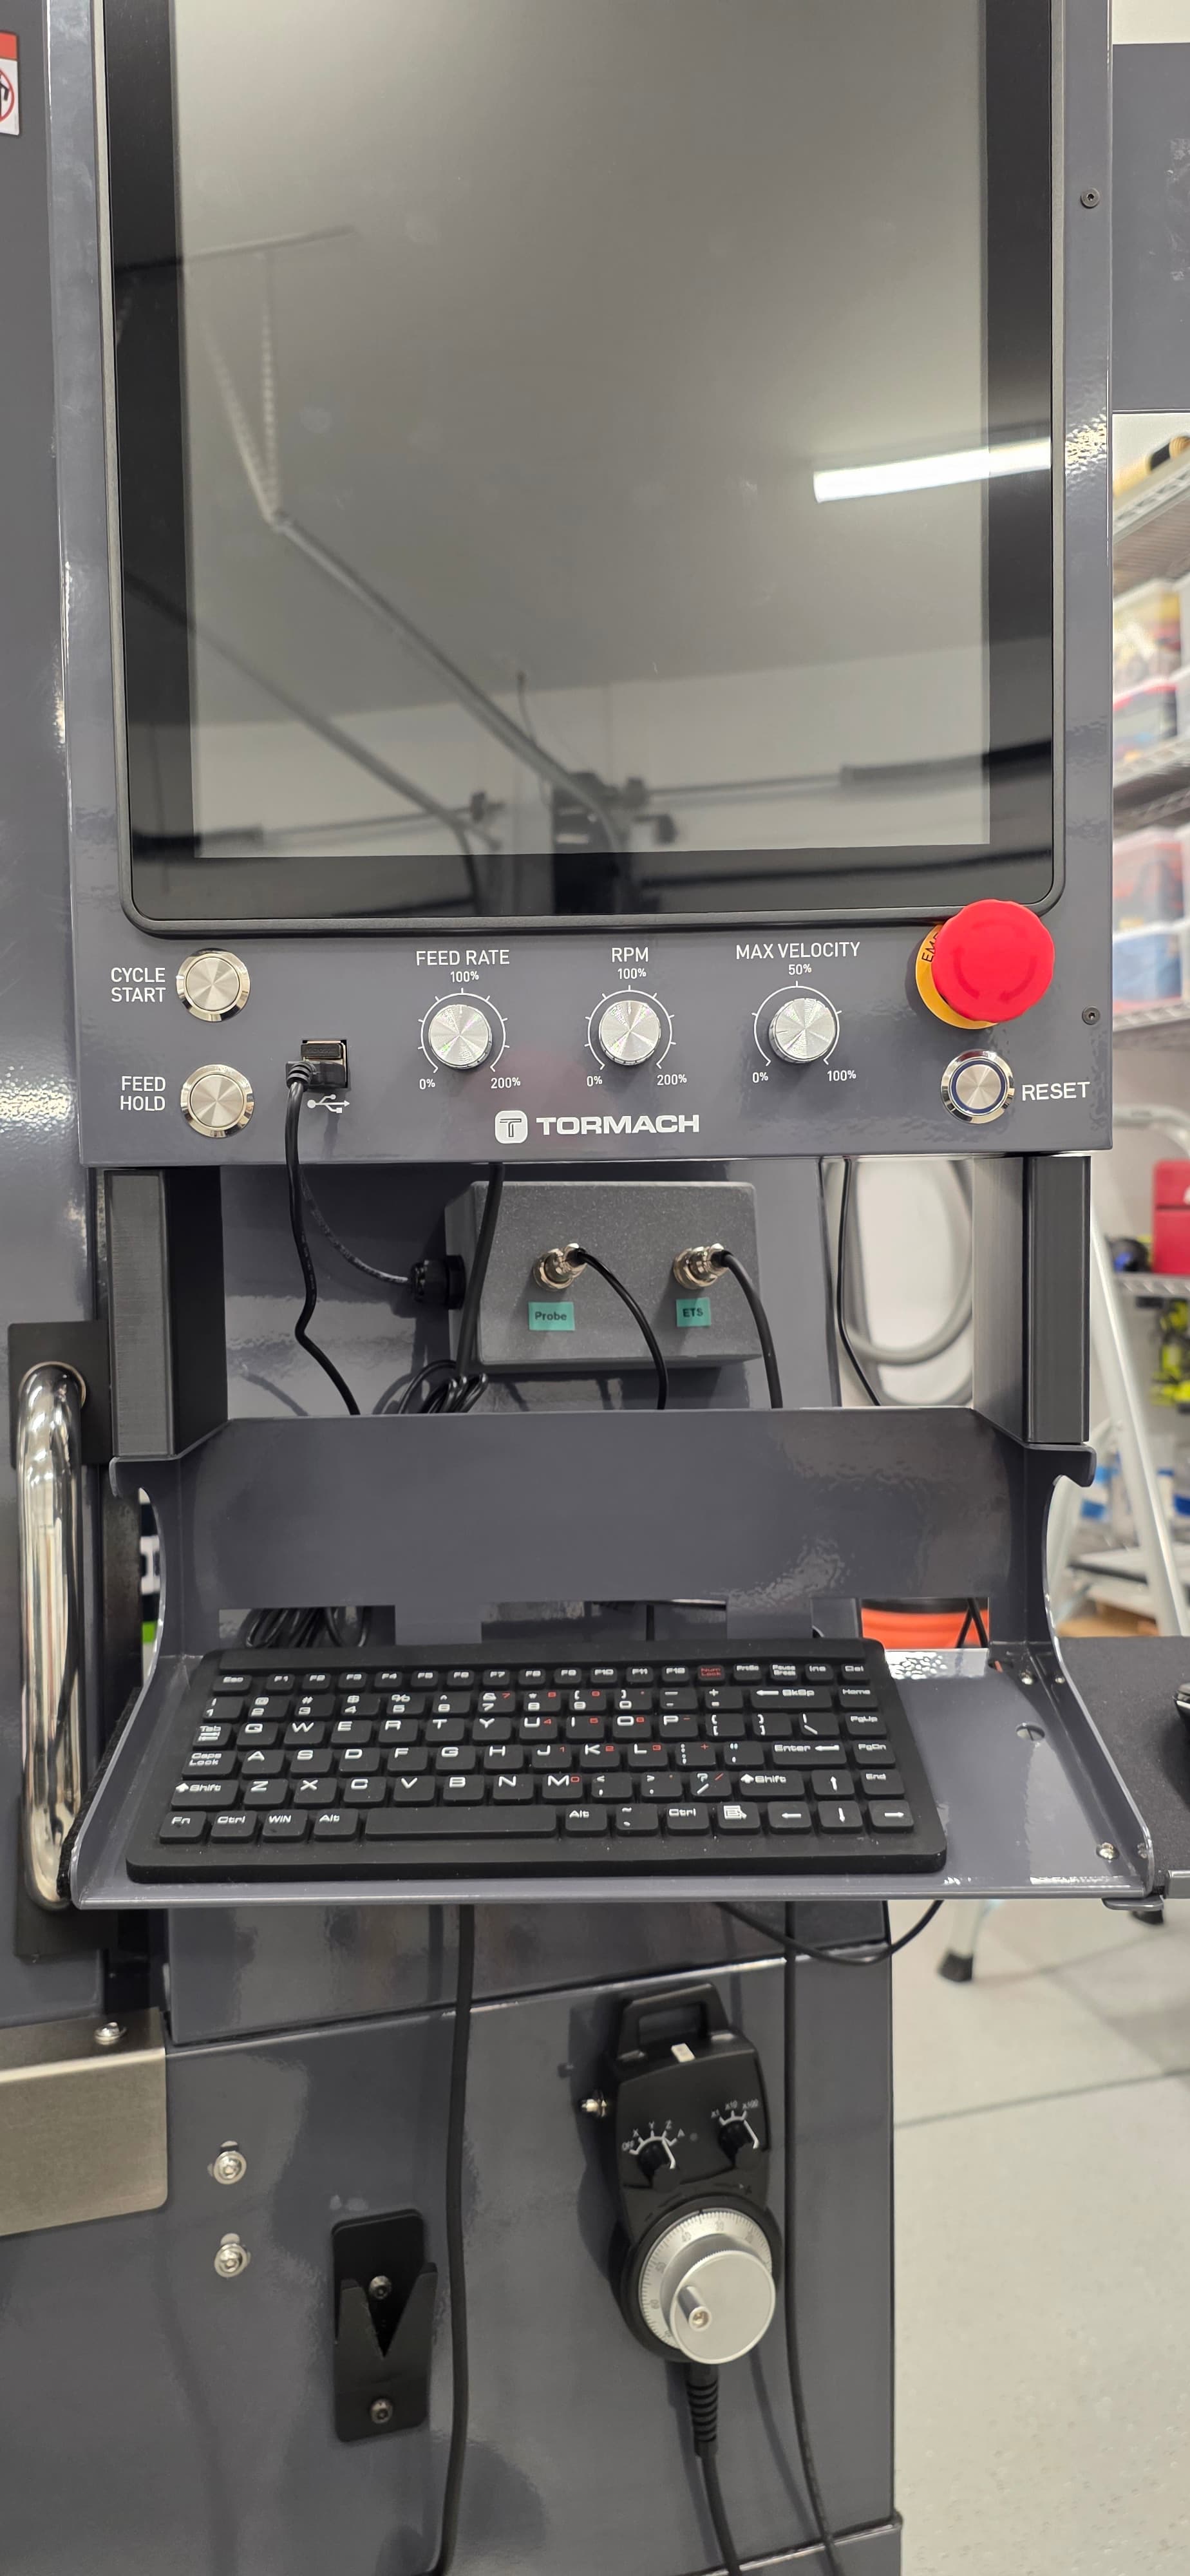
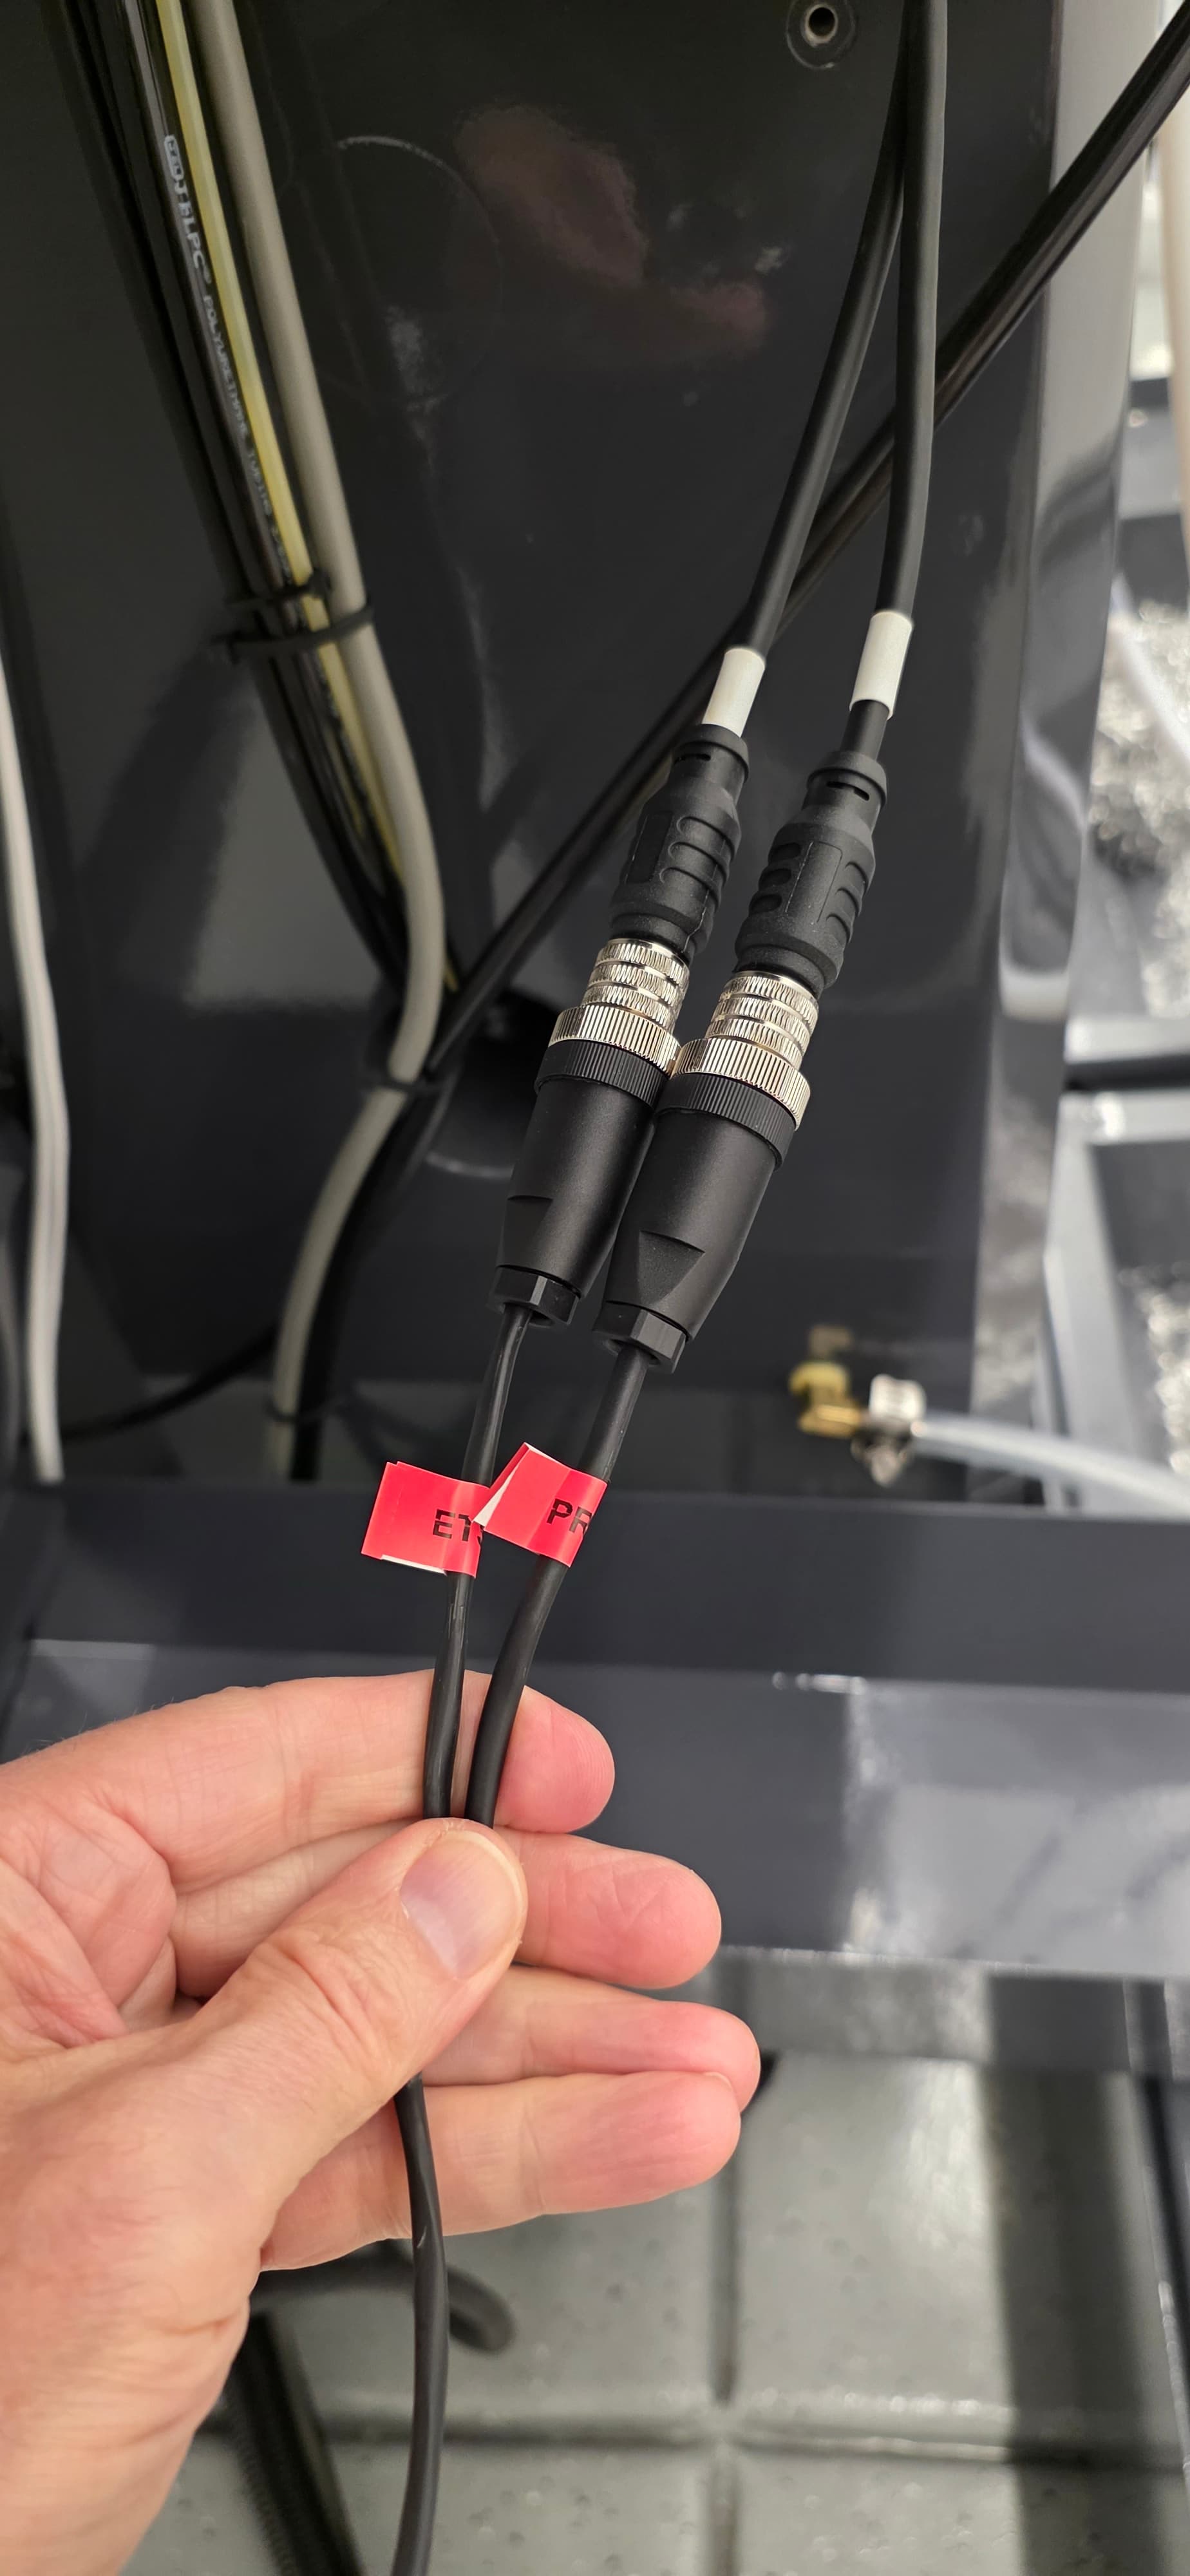
My workflow is such that I remove my probe and TT from the machine when I am not using them. I wired them so the cables plug in at the front of the machine and the wires fit easily in a void in the bottom right-hand corner of the door. To accomplish this I 3d printed a box to contain the two connectors for the probe to plug into. The box has magnets on the back that stick to the front of the mill. This box will only fit in the space shown if you lower the keyboard (Another Post).
The wires from this box pass easily with all the other wires that connect to PathPilot and can very easily be fished to the rear of the machine.
Since the probe and TT use only two wires each, I ran a single 4 conductor shieled cable to the rear of the machine. These connect directly to the Tormach Wired probe adapter cable.
On a separate note, like many on this forum, I am a hobbyist and look for lower cost options to get the job done. My probe is not a cheapy at about $800.00 and fairly accurate (test results below). For fun I thought I would use it indirectly to see how repeatable the $65.00 tool setter ($50.00 when I bought it a year ago) is. I probed the top of my vise and set the Z-axis coordinate to 0. Repeatedly probed the top about 10 more times measuring the actual Z height (not resetting the Z value). Every time I got the same exact result Z-0.0000. This confirms that the machine and probe are repeatable to 1/10,000!
I then put a tool in the spindle and measured its length. I repeated this 10 times. The value changed by no more than .0003. This is more than workable for my hobby work.