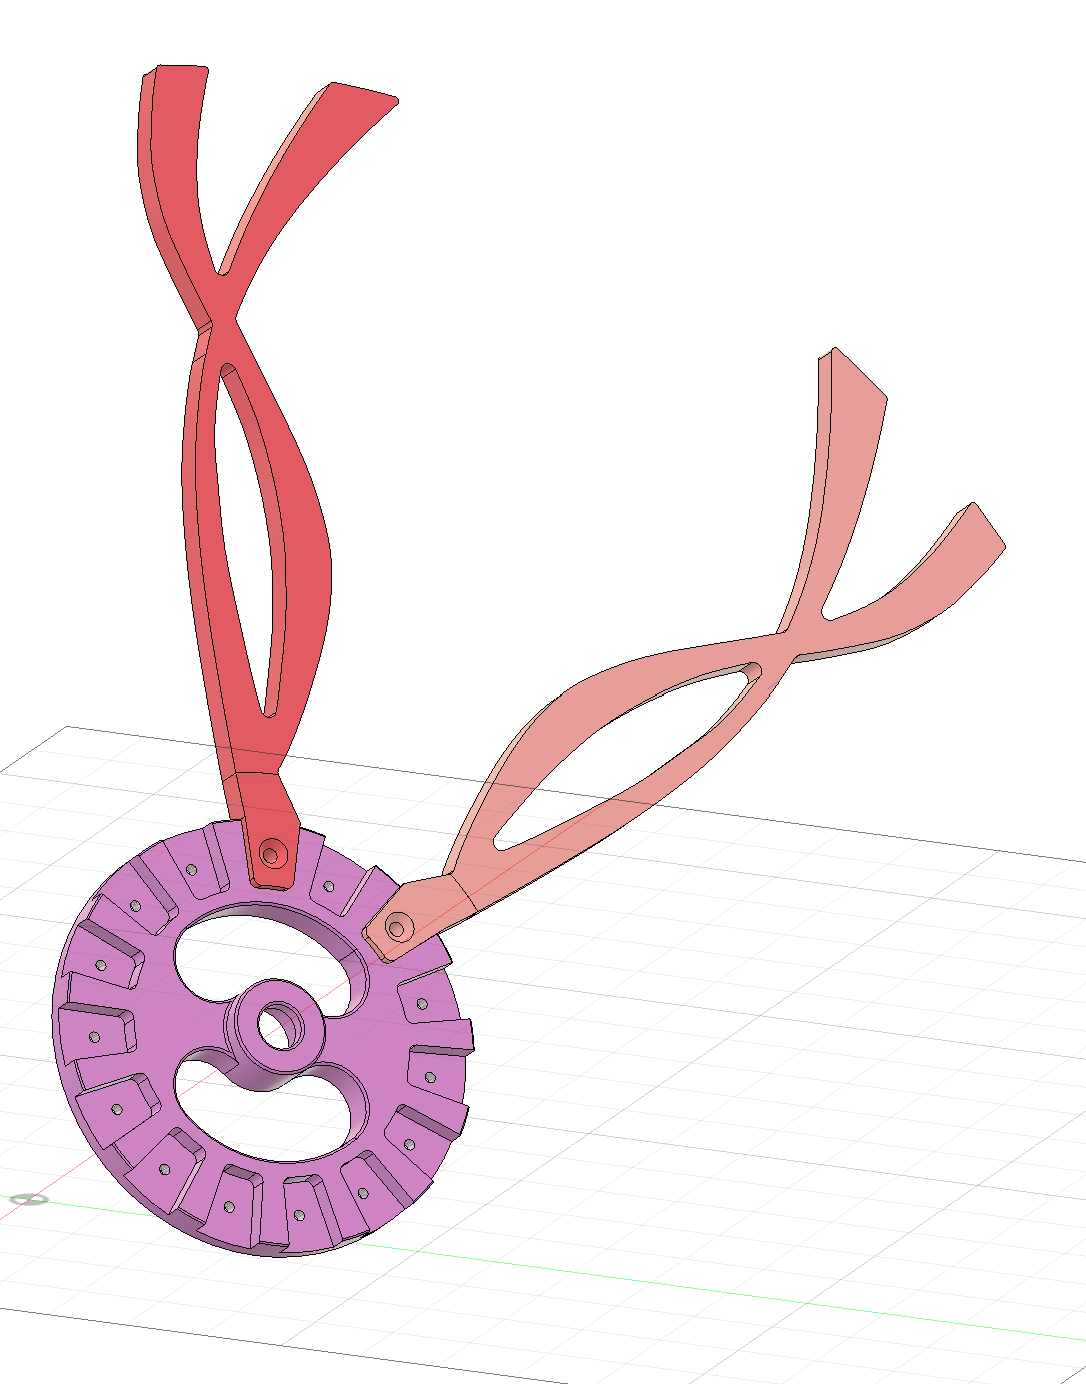
Ok… one more work holding question. I have a total of 30 of these “wings” that attach to a hub. In a perfect world, I would buy 6061 very close to the thickness of these wings (.25 or .375 inches thick). Because there are 30 of them, I do not want to use the CA glue approach. Here is the approach I am thinking of that would require adding a few screws that go through the model.
Face one side of the stock.
Flip stock, face reverse side and drill 3 or 4 holes in stock that go through the model in 3 or 4 places.
Screw model to a base plate using holes form above and machine the geometry.
Flip stock one more time, screw into a fixture plate with male recess and use same screw holes to secure to fixture plate with male recess. This will provide perfect registration. Machine chamfers on reverse side. Done.
Seems like too many steps. Is there a better way to do this? Could I use soft jaws and make a plug that fits in the oval shape in the middle of this part so it can withstand the jaw pressure?
If they are all the same, I would consider sending that out to a waterjet or laser shop. SendCutSend has a pretty good online estimator. You would have to clean up the edges and/or do finish cuts but it makes your workholding a lot easier.
Otherwise tabs and custom soft jaws should work. If you don’t have a lot of material to cut on the backside, you probably don’t need a filler for the internal gap.
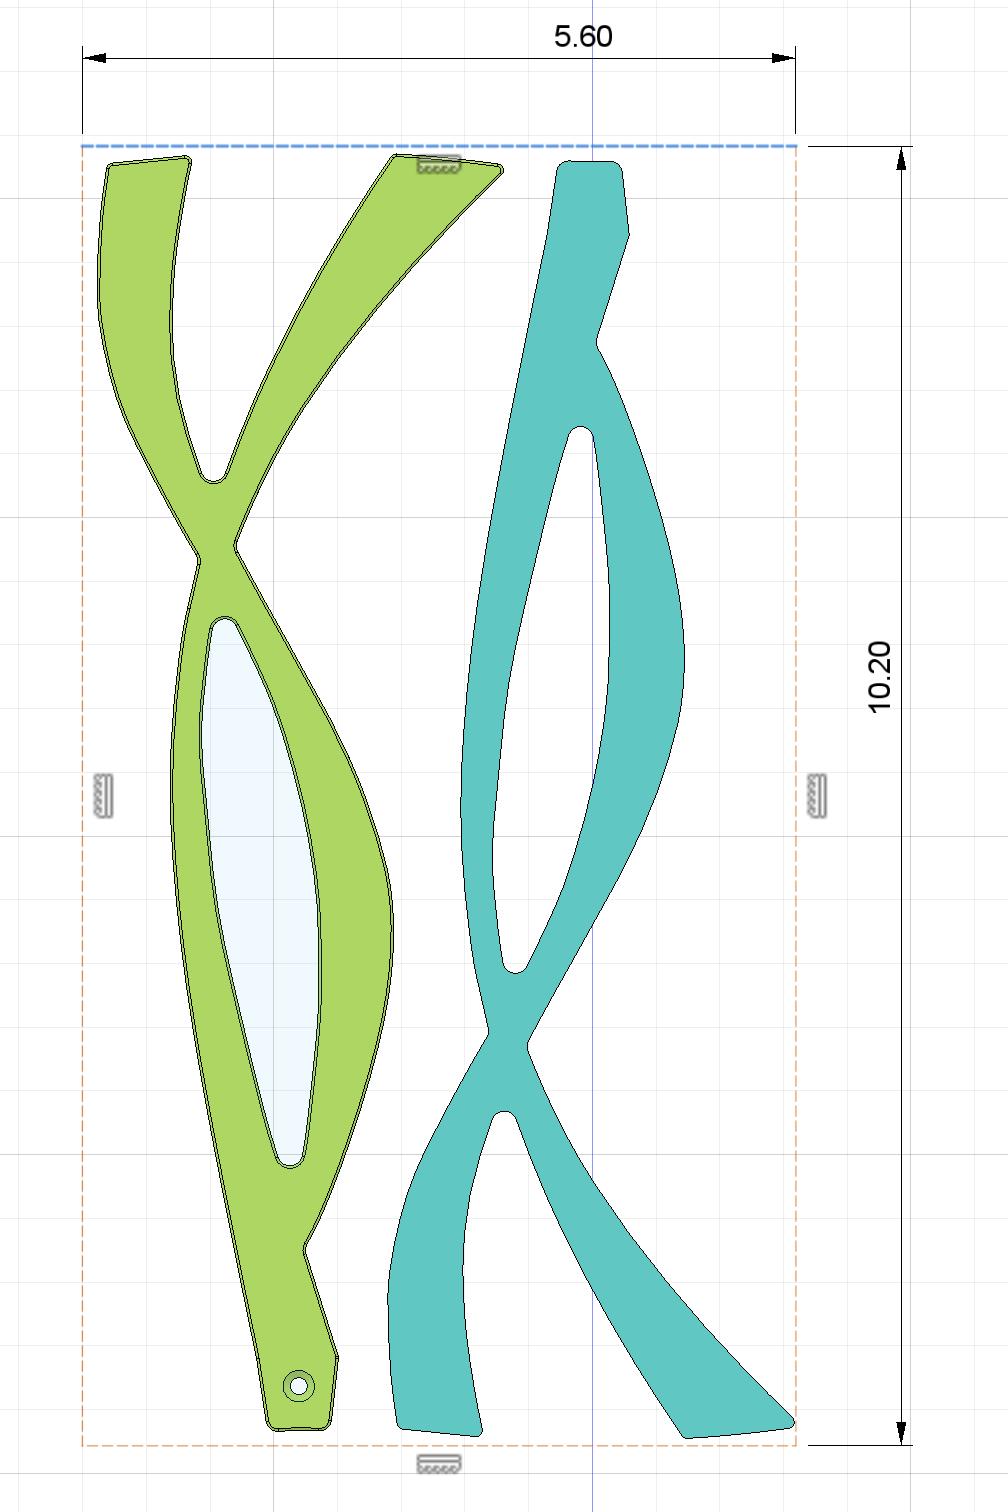
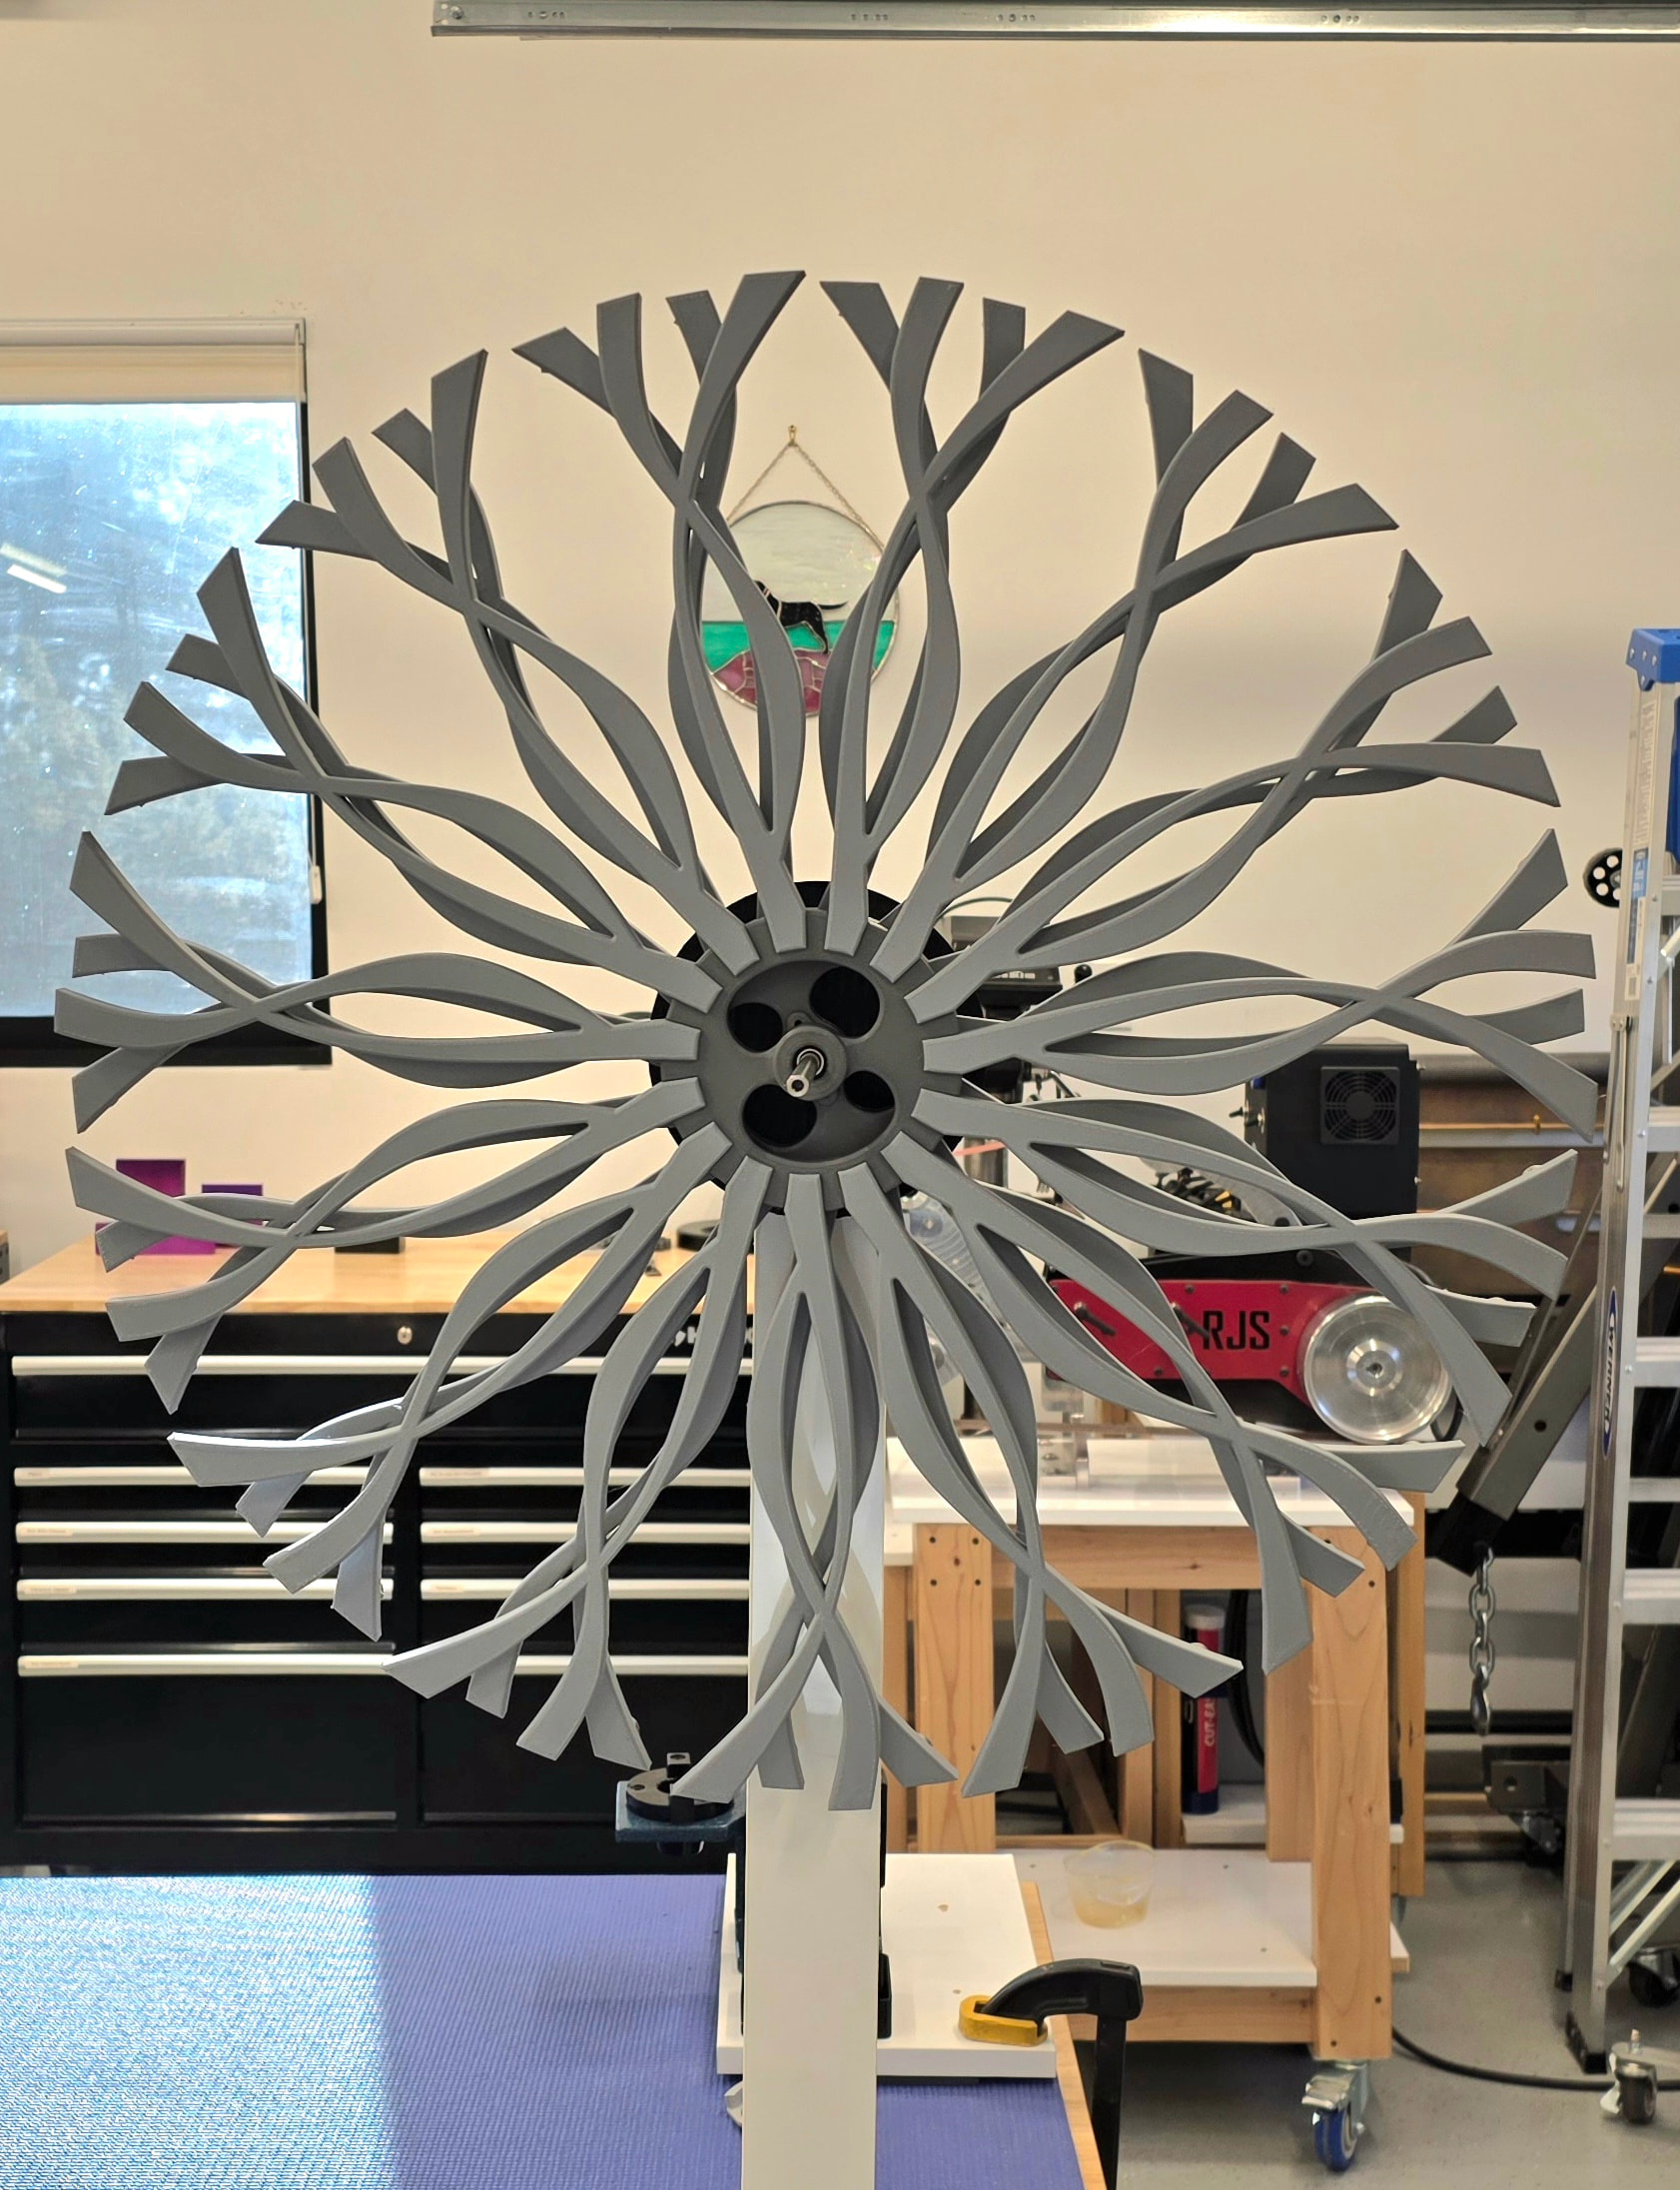
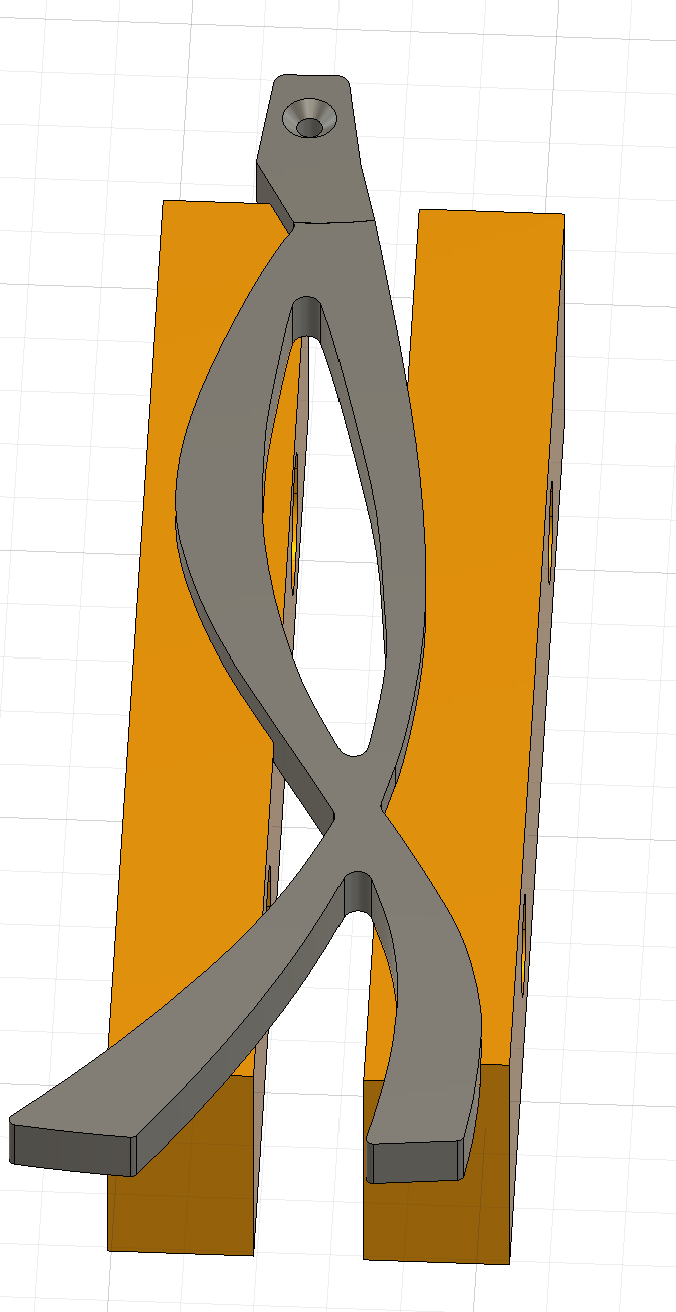
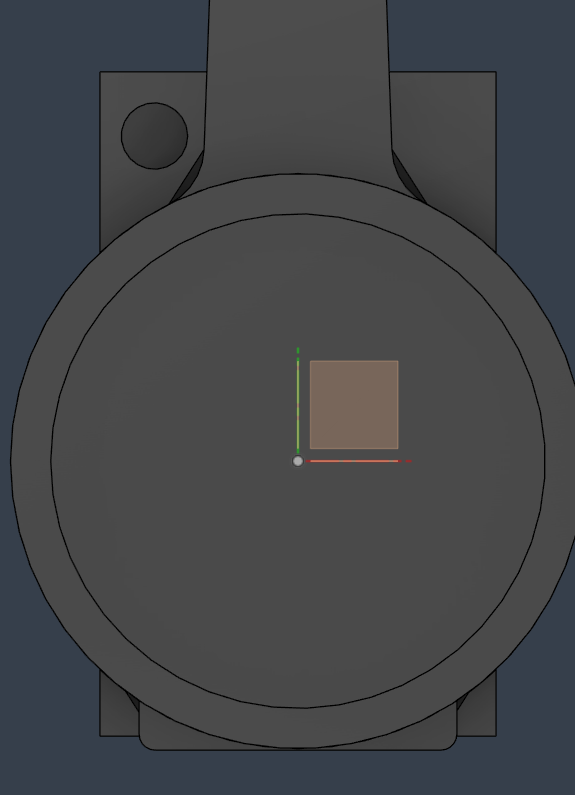
Thanks for all the great ideas. Below is an image to show relative size. All 30 pieces are the same except the hole for the flat head screw goes from one side for 15 pieces and the other side for the other 15. 15 pieces get attached to one hub and the other 15 to another hub. I have included a 3d printed model below.
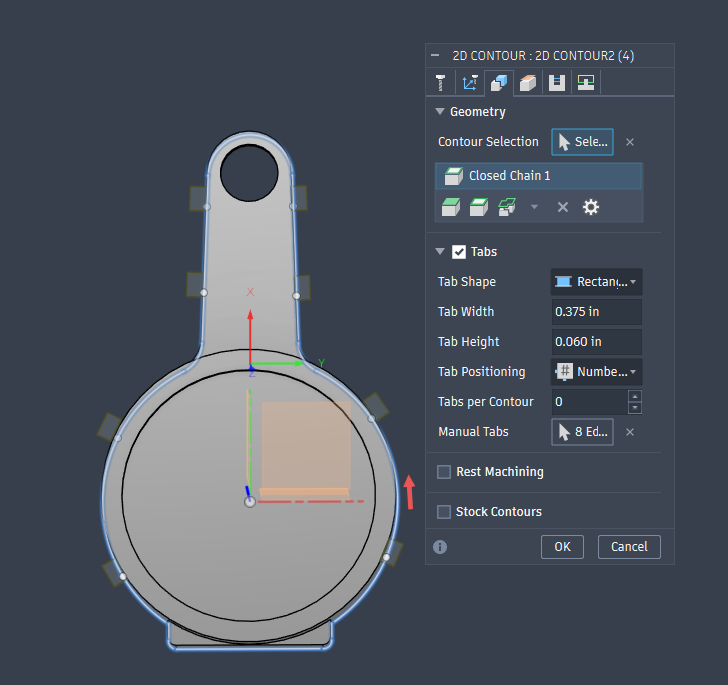
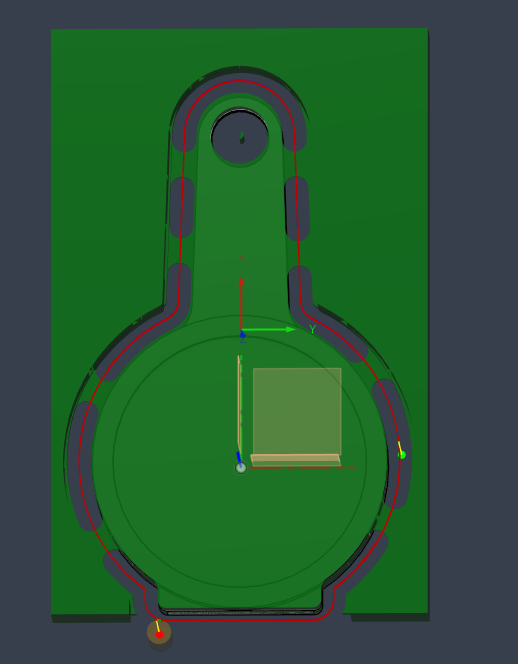
I really like the idea of cutting these from a sheet. I have never used tabs before. Am I correct that the tabs are only partial depth so once you cut them off, you can place the part in soft jaws and machine the remnant of the tab away? Any tips you have on tabs would be great. Lastly, since the piece is long, do you think I need that filler for the inside oval when I put it in the soft jaws?
Thanks again for your suggestions. I like the idea of SendCutSend, but I bought this mill to make it work .
Correct. Tabs are usually partial depth. I shoot for stock that is thick enough to cut out the part and also have enough for the tab. For example, use 3/8”stock for a 1/4” part. Then you can face it, and still have room underneath to leave a tab that will get decked off in op2.
These parts are so long that they are begging for super glue work holding. What’s your hang up there? You could place a few locate pins in a fixture to register the 2nd op part onto a known WCO.
For filer in the void, that depends on how hard you squeeze the piece which is a function of how hard you’re going to run op2.
With the length of those you might need two vises, then you could focus the grab on the two intersections.
Actually, I like the CA approach, but for 30 pieces, I thought it might be lots of glue and tape. I am a bit confused on OP1 as if I start with a large sheet and glue it down, it can be hard to remove. If I use tabs, I am not clear on how to machine them.
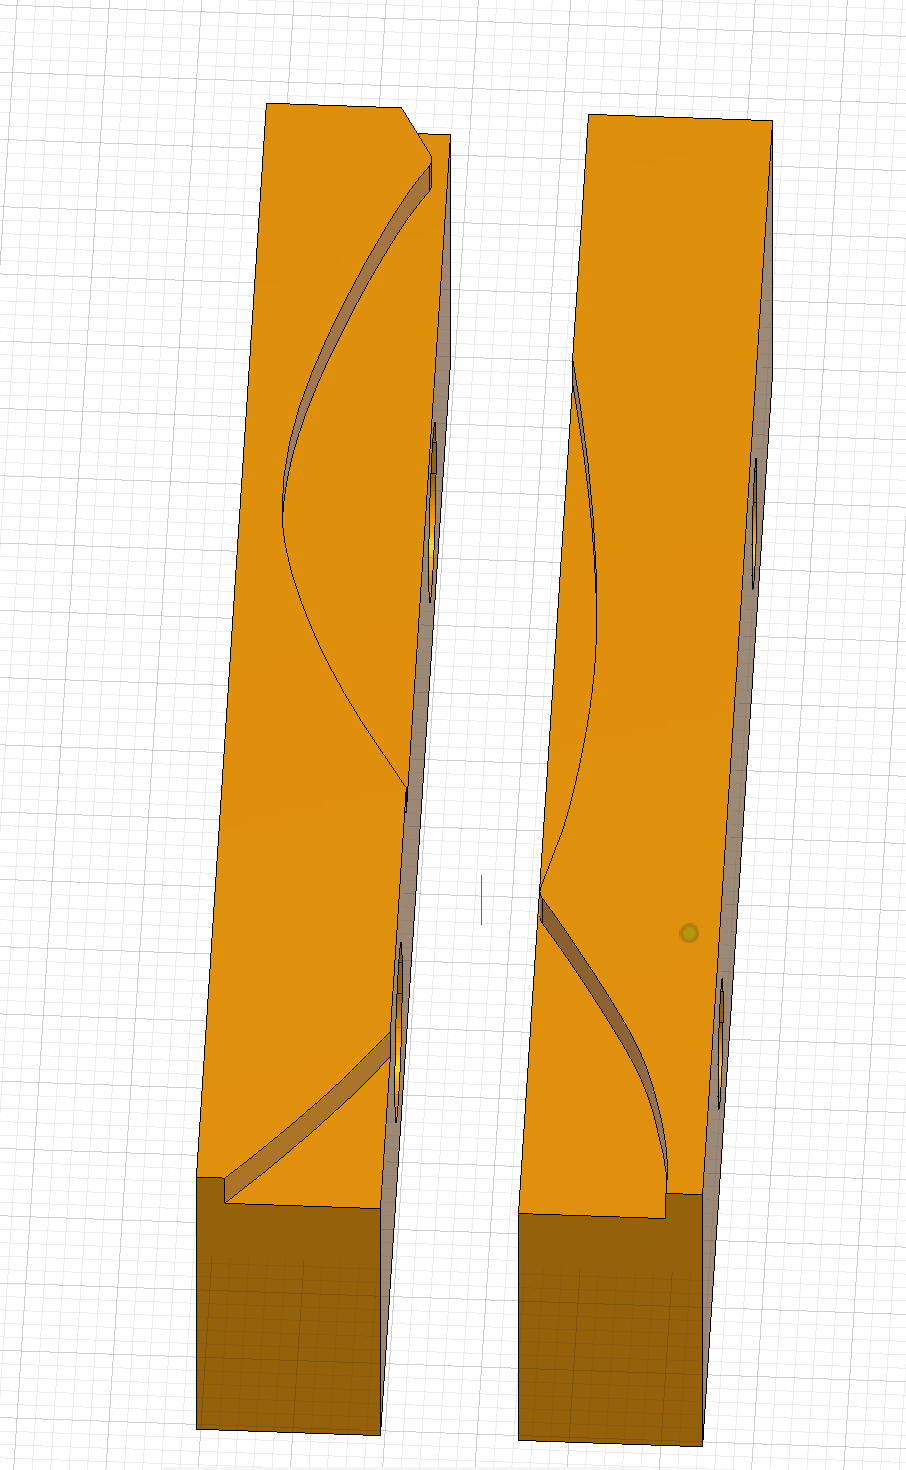
For the second operation, I was playing with what the soft jaws would look like. The jaws below are 8” long and look like ok to me. What do you think? This second operation is just chamfering and maybe facing so nothing too aggressive. I am leaning to using glue for the 1st operation and soft jaws for OP2, but I am not really clear on how to machine tabs if I go this route.
You folks have way more experience than me. I welcome your thoughts.
You will use a fair amount of tape and glue. When I made a pile of Batarangs a while back I went and found ~4” wide blue tape which made it easier. I screwed down the sheet for Op1 but that required an Op0 to prep the material. In that project it was worth it.
Do you have MQL or Flood coolant? For MQL you can use blue painters tape but for flood you need powder coating tape.
If using blue painters tape then you can pop the part of the fixture with a putty knife when you are done. The CA glue technique is strong in shear but will pop up with a fair amount of prying force. I haven’t worked with powder coating tape yet.
Taps is a check box in 2D contour type operations, depending on your CAM option. I use Fusion360 and it is right in the tool path generation.
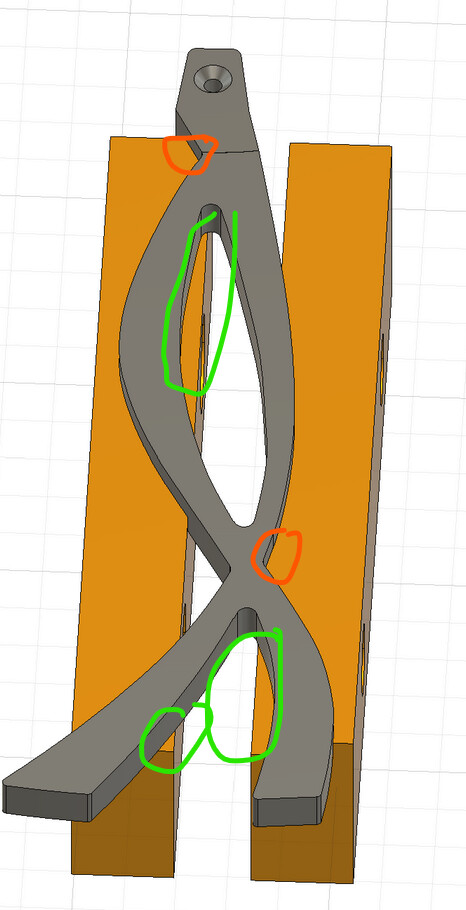
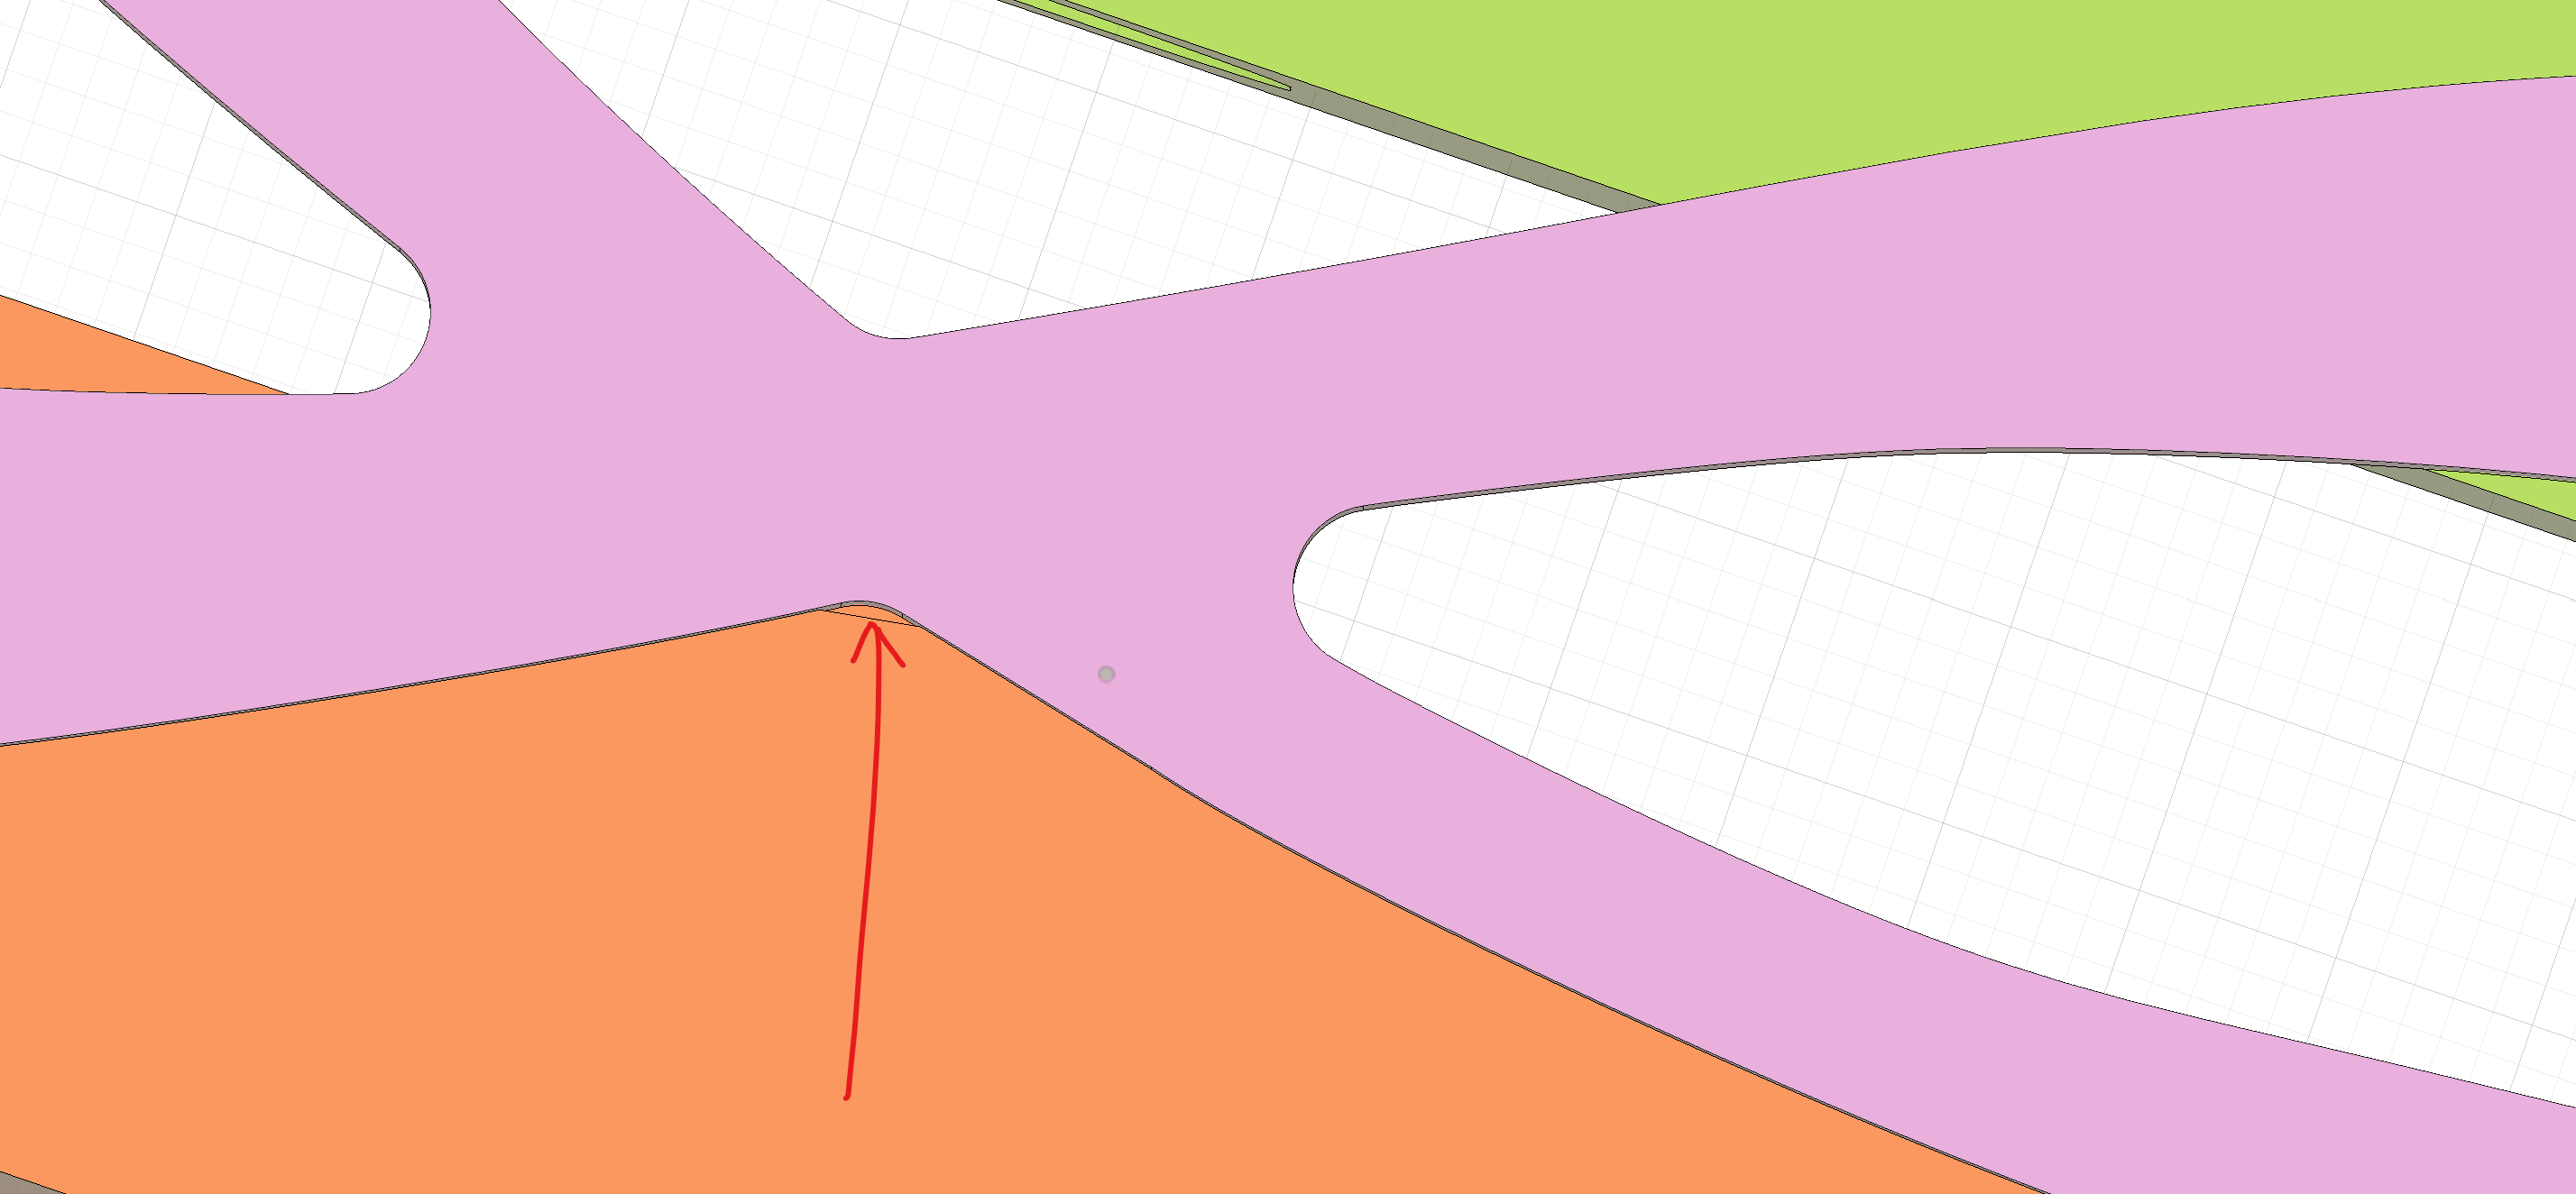
Your soft jaws look pretty solid, you might have to get creative with the long jaws so they don’t flex out on you. I highlighted a few areas to pay attention to:
Orange: make a relief on the inside corner, don’t follow your part geometry exactly.
Thanks Davie. Funny I just did a part with blue tape using flood. The flood softened the tape so I left the part in the mill overnight covered with flood and it popped off in the am.
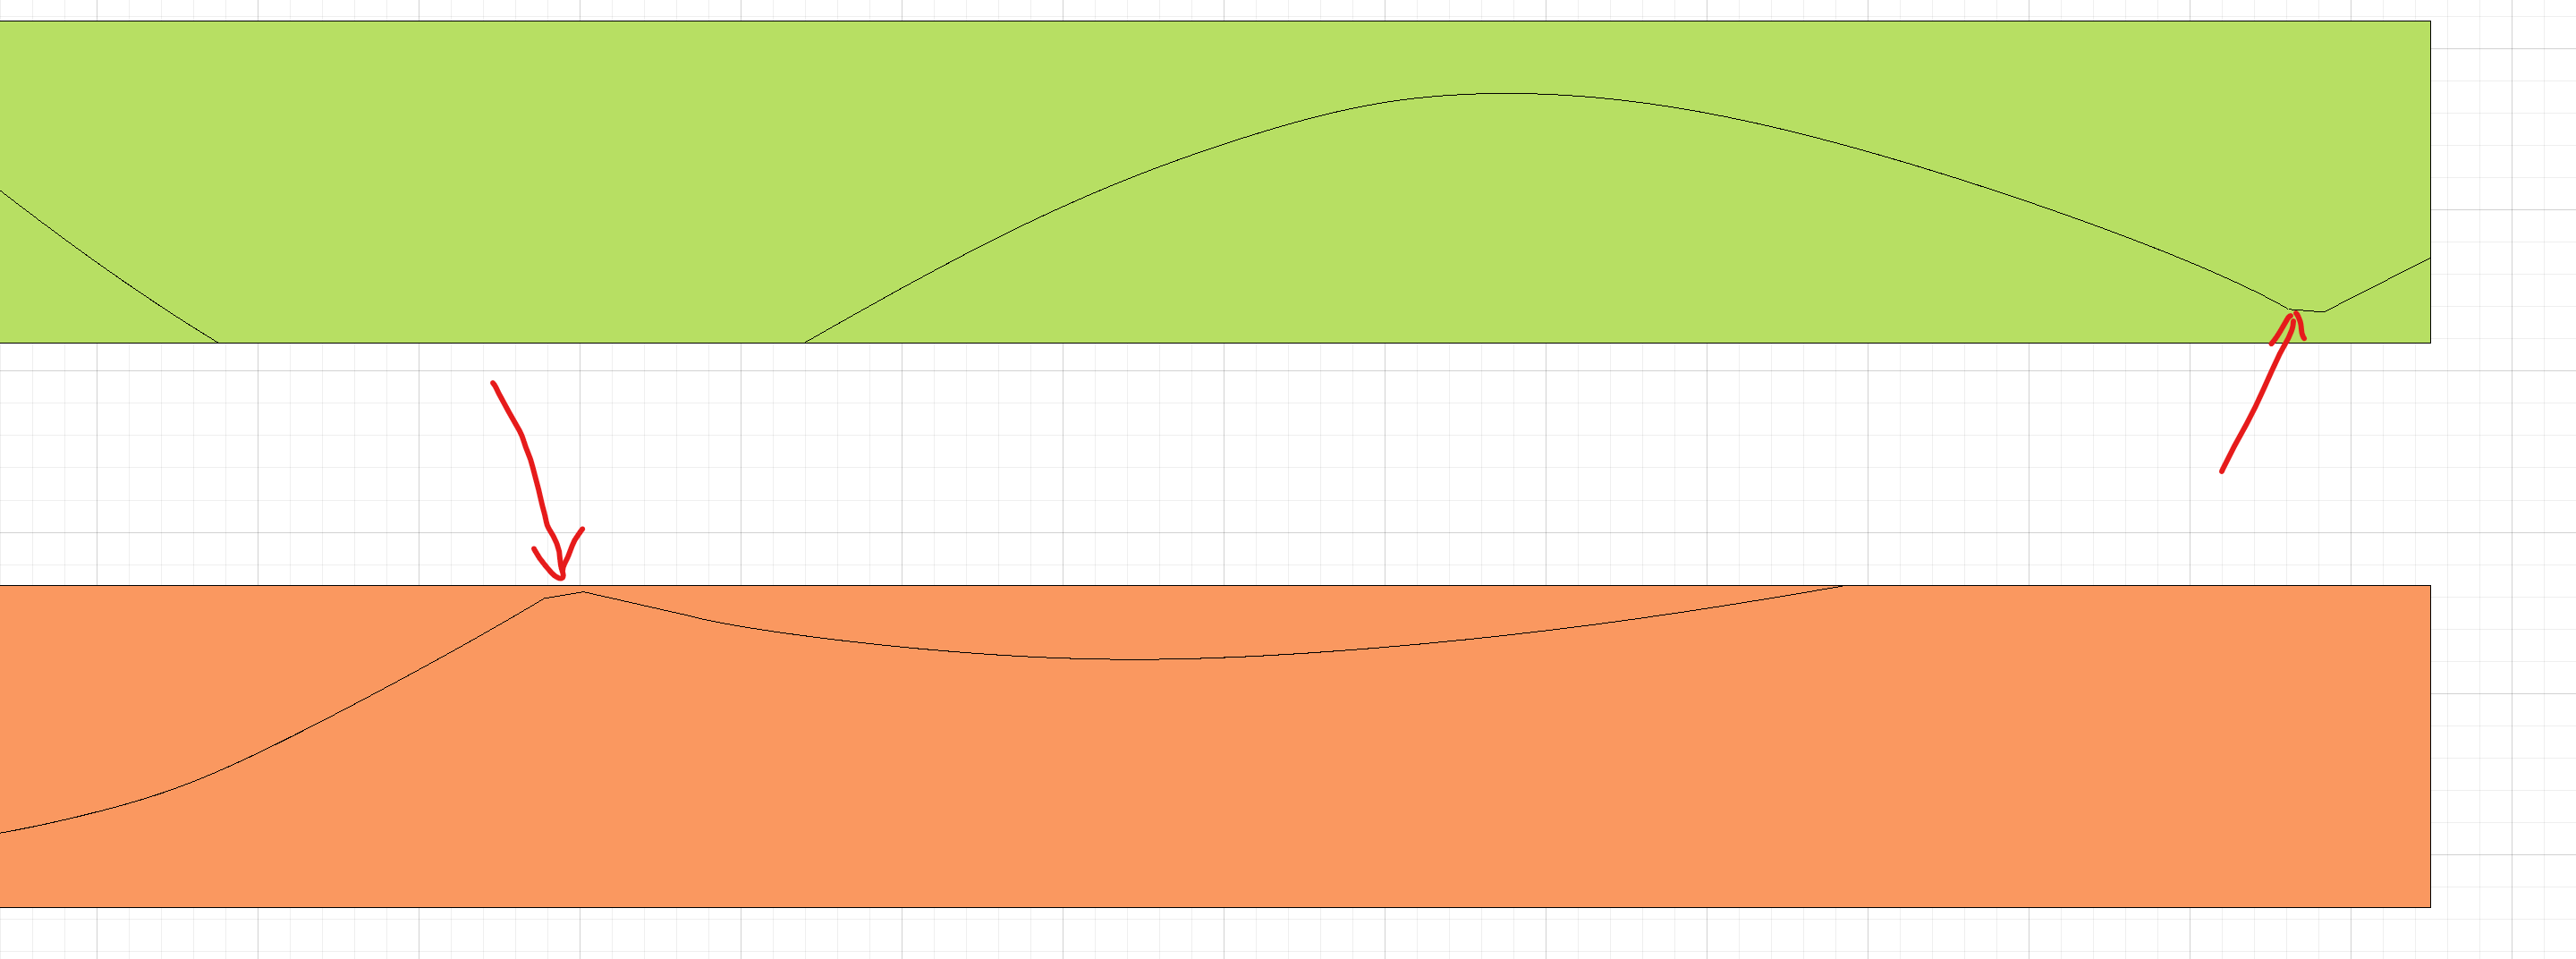
With respect to the jaws, I had removed the green section in the above, but can you clarify what you mean by a relief on the orange section and by not following the part geometry exactly.
On inside corners like in the orange, I don’t make the jaw geometry match the part geometry exactly, I cut the corner a little shallow. This allows for slight variations in the part for tool wear and such. If the inside corner matches exactly then you can end up with a pinch point right there instead of spreading the clamping pressure around. Here is an example:
ok. I see you want a bit of space so the soft jaw does not fit right into the inside corner like below. Strange, I thought you want that tight fit to provide better registration.
It probably doesn’t help much today but this type of part is a perfect candidate for being laser/waterjet cut. The countersink I’d probably just do by hand with a drill press but if I was going to do it in a machine I’d just make a fixture with a few dowels for alignment and some hold down clamps.
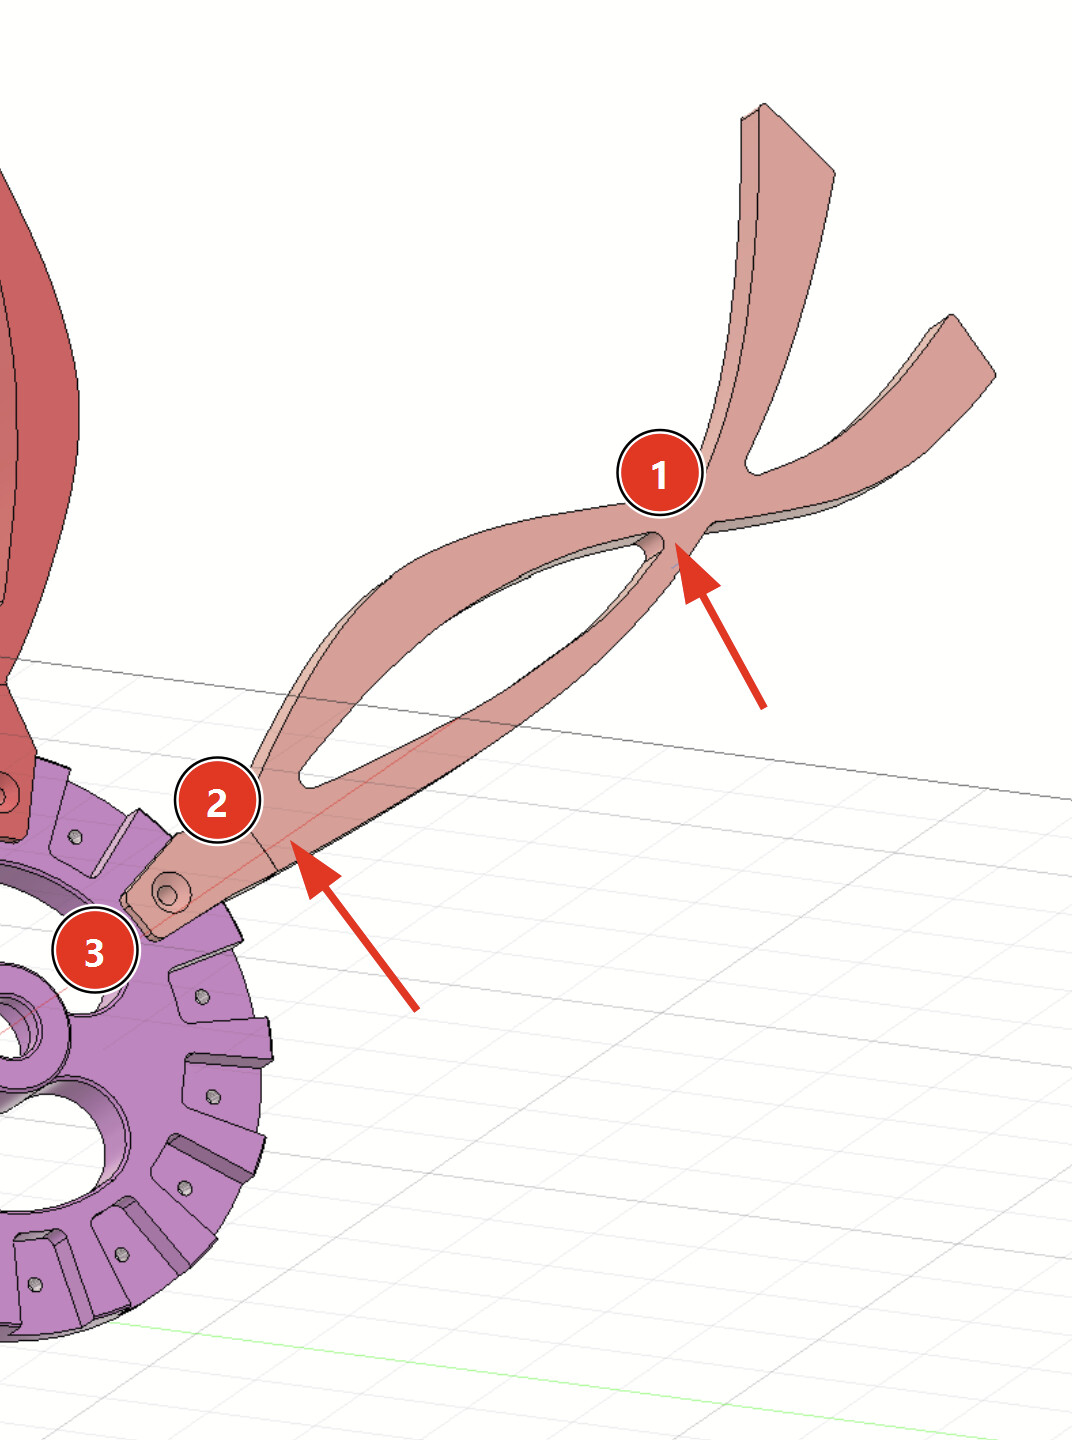
Thanks Norman. I am a bit new to machining but I’m trying to picture how you would clamp it without the clamps getting in the way of the tool path and where the pins would go.
This part is pretty difficult to find a good location since it’s all curved but 1/2/3 are what comes to mind first for locations, and I’d specifically have pins smaller than the radii. I’d put the clamps at the arrows.