I made a footstool for my niece and inlayed her name into the lid. There wasn’t a lot of good information about using CNC to create inlays online, so I thought I’d post these detailed steps to make it easier for others to figure out. The process is simple:
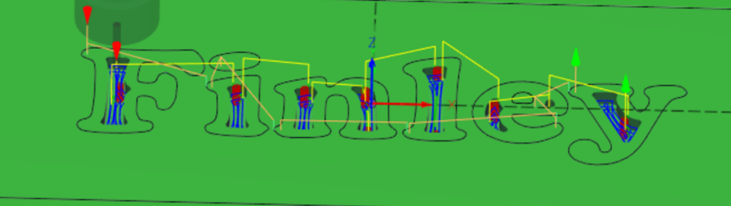
- Create a female pocket (shown in the upper left of the above photo)
- Create a male ‘extrusion’ (lower right)
- Chamfer the edges to get a nice mating surface for gluing
- Glue them together
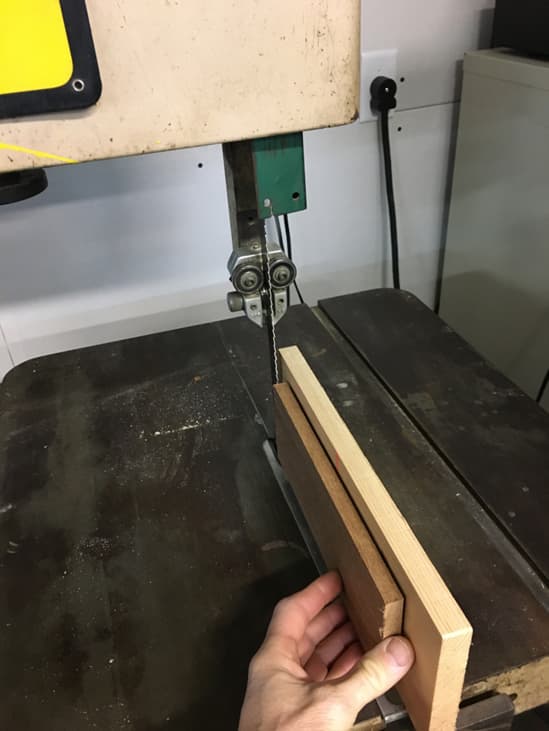
- Cut them apart
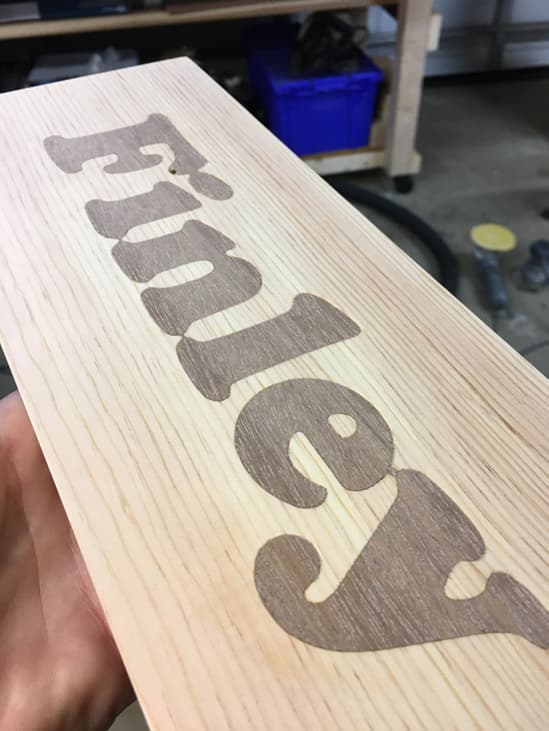
- Sand to reveal the inlay.
Here’s how I did it using Fusion 360, although this general technique works with any CAD/CAM software:
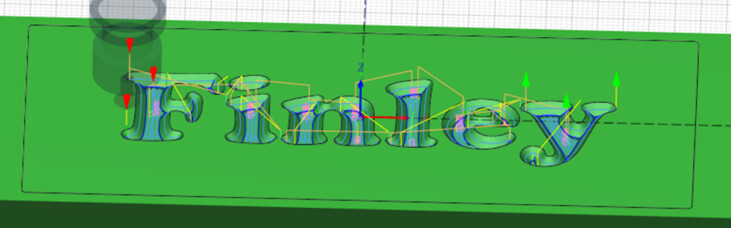
Create the female in Fusion as a simple press/pull cutting away the cavity:
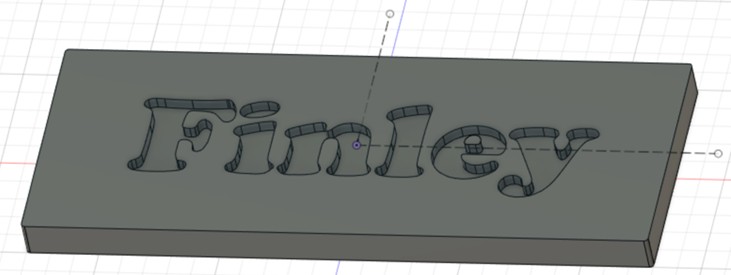
Note that the sides are vertical in the model, but will have 45 degree sides when it’s machined. I picked a depth of 0.200” for this project which gives plenty of surface for gluing. The depth can’t exceed the cutting depth of the V carve bit that you’re using, so our 1/2” Amana tools vcarve bit can’t go past 1/4” depth.
Then create the male as an exact mirror:
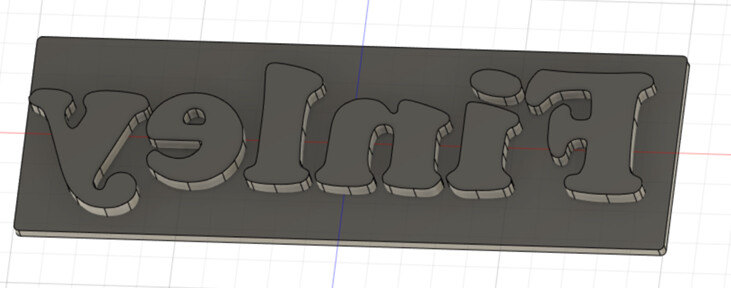
An easy way to do this is to copy the sketch used for the cut in the female, but extrude it in the opposite direction. This extrusion must be taller than the female is deep. I used 0.300” for the mirrored text here - which gives me about 0.100” gap to saw between after the glue dries.
Note that I didn’t bother modeling the big chamfered edge on either the female or male part. You could, but it’s extra work and I didn’t think it was needed. The chamfer is created in the real physical part using a V bit and a 2D contour toolpath.
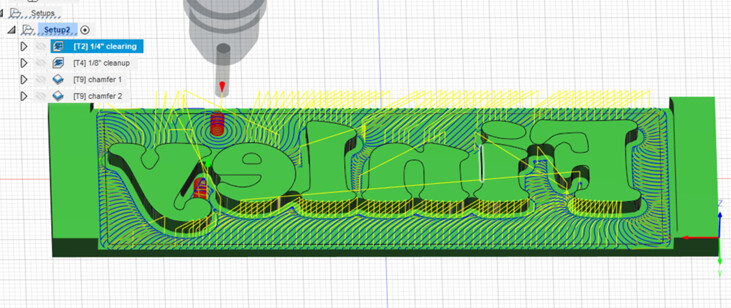
The female part of the inlay will require at least two tool paths:
- The vcarve tool path, which uses 2D engrave
- A ‘cleanup’ tool path to clear away material at the bottom that’s not reached by the vbit, using 2D pocket
I listed these two in the ‘logical order’ but I think you get better results if you do the bottom landing ‘cleanup’ step first, then the engrave with the v cutter last.
Whenever the feature to be engraved is wider than the v cutter will reach during the engraving passes, little hills are left at the bottom of the part. These need to be cleaned up or the male won’t fit well for gluing. An easy way to do this is use a 2D pocket pass, and specify a generous radial stock-to-leave amount so that the pocketing pass doesn’t take away the 45 degree wall cuts.
You can see here that I used an 1/8” endmill with 0.200” radial stock-to-leave to flatten the bottom of the pockets where the v cutter wouldn’t have reached:
Then the engrave sequence uses the v cutter. You must specify a bottom height equal to the pocket floor in order to have the engrave follow properly:
TIP! When you touch off the workpieces, if you touch off 5 or 10 thou above the female pocket, the chamfer won’t be as large as the programmed pocket, which is fine. It means that the male will sit a little proud when you glue them up. If it’s exactly on size it works, but if the female is too big, you get gaps in the inlay. I found that to accommodate uneven wooden surfaces it’s best to leave the female pocket a little smaller than programmed, which you can easily do by setting Z zero to be about 5-10 thou above the actual surface of the workpiece.
Similarly, at least two toolpaths are required for the male part as well:
- One or more 3D adaptive paths to clear away most of the material, leaving only the male part exposed
- One chamfering path to cut the 45 degree sides
Above you see that the 1/4” end mill didn’t get into the smaller cavities in the ‘e’ and ‘n’ and 'f’ so I needed to add another path with an 1/8” endmill using rest machining:

Finally, the chamfer:
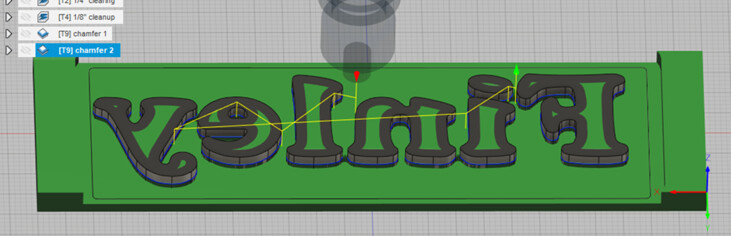
We know that the female chamfer is 0.200” deep, so anything larger than a 0.200” chamfer will work for the male. I extruded the male to 0.300” so I could have used any value between 0.200” and 0.300”
When you’re done machining, simply glue, saw, and sand: