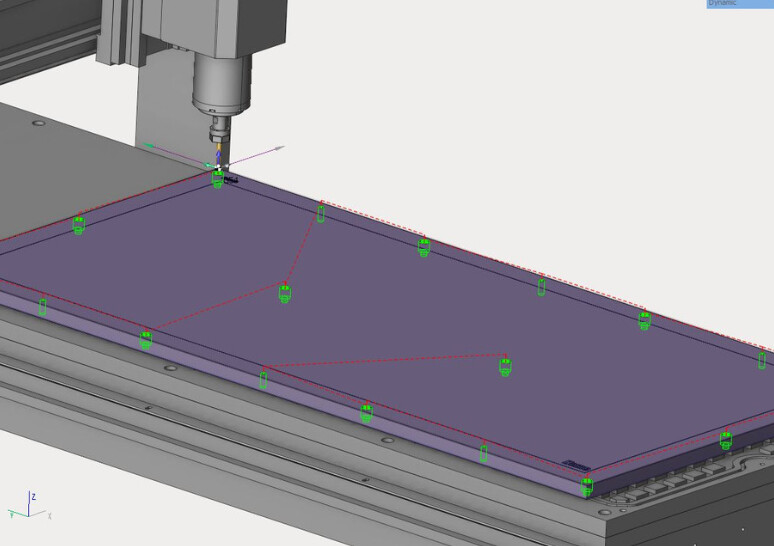
For those of you with the vacuum table, are you using the full 15 bolt pattern shown in the manual to hold down the spoil board?
The T-slot nuts are about $8 each on McM-C and I wanted to figure out if I really need all 15 of them before ordering and drilling/boring all the holes.
Spoil boards I use are held down with 12 bolts specifically supplied with the router. They are cut to a specific length so they don’t extend under the vac table.
What T-slot nuts are used?
Maybe Tormach changed the way its bolted down.
I uploaded models of the spoil boards I use to grabcad
I have 24r programs to drill all the holes for bolts and pins…
Happy to see a little 24R Router Thread here! Spoilboard Bolts should be provided with the machine hardware.
T-Slot Nuts (Not Provided) are used outboard of the 24x48 spoilboard for additional clamping capabilities. I have found the cheap little thin oval shaped nuts work well in the tracks. Also to note, there are threaded holes at the front of the machine for camping parts vertically (in a Z-Axis orientation) for slotting or mortise and tenon type work.
Also to note, for maximum vacuum hold down, the edges of MDF should be sealed and both Surfaces, Top/Bottom should be surfaced about .015”. I usually run a tool path to cut the registration pins and surface the bottom of the MDF .015” and then flip it over and run a 2nd tool path to run the bolt holes. Then tighten the bolts and finally surface the Top of the MDF flat AFTER tightening the bolts.
Get some scrap acrylic to place around smaller parts and the vacuum works well. Unfortunately the units supplied by Tormach are unbelievably noisy, and wish they would move to a system like Airweights.com Leveraging smaller pumps and better sealing through gasketing.
Hope this helps. I will try and remember to share a DXF of the hole patterns here.
Here is a .DXF file of the 24R Mounting Bolt and Registration Pin Pattern. I have also included a ‘PDF’ of the Parameters from the 24R Manual. Machine the Registration Pins to a depth of .255” from Side A, then machine the Bolt Head Holes to a Depth of around .500”, and the Bolt Shaft holes all the way through the spoilboard on Side B. Also Page 229 of the Manual. Hope this Helps!
Well, here I am back again. This machine has been such a headache to get fully set up, I kind of shelved it while working on other projects. Tormach should really improve the documentation on this or put up a video, I really feel like this machine is a red-headed stepchild as far as support is concerned. Nothing terrible but a lot of rough edges.
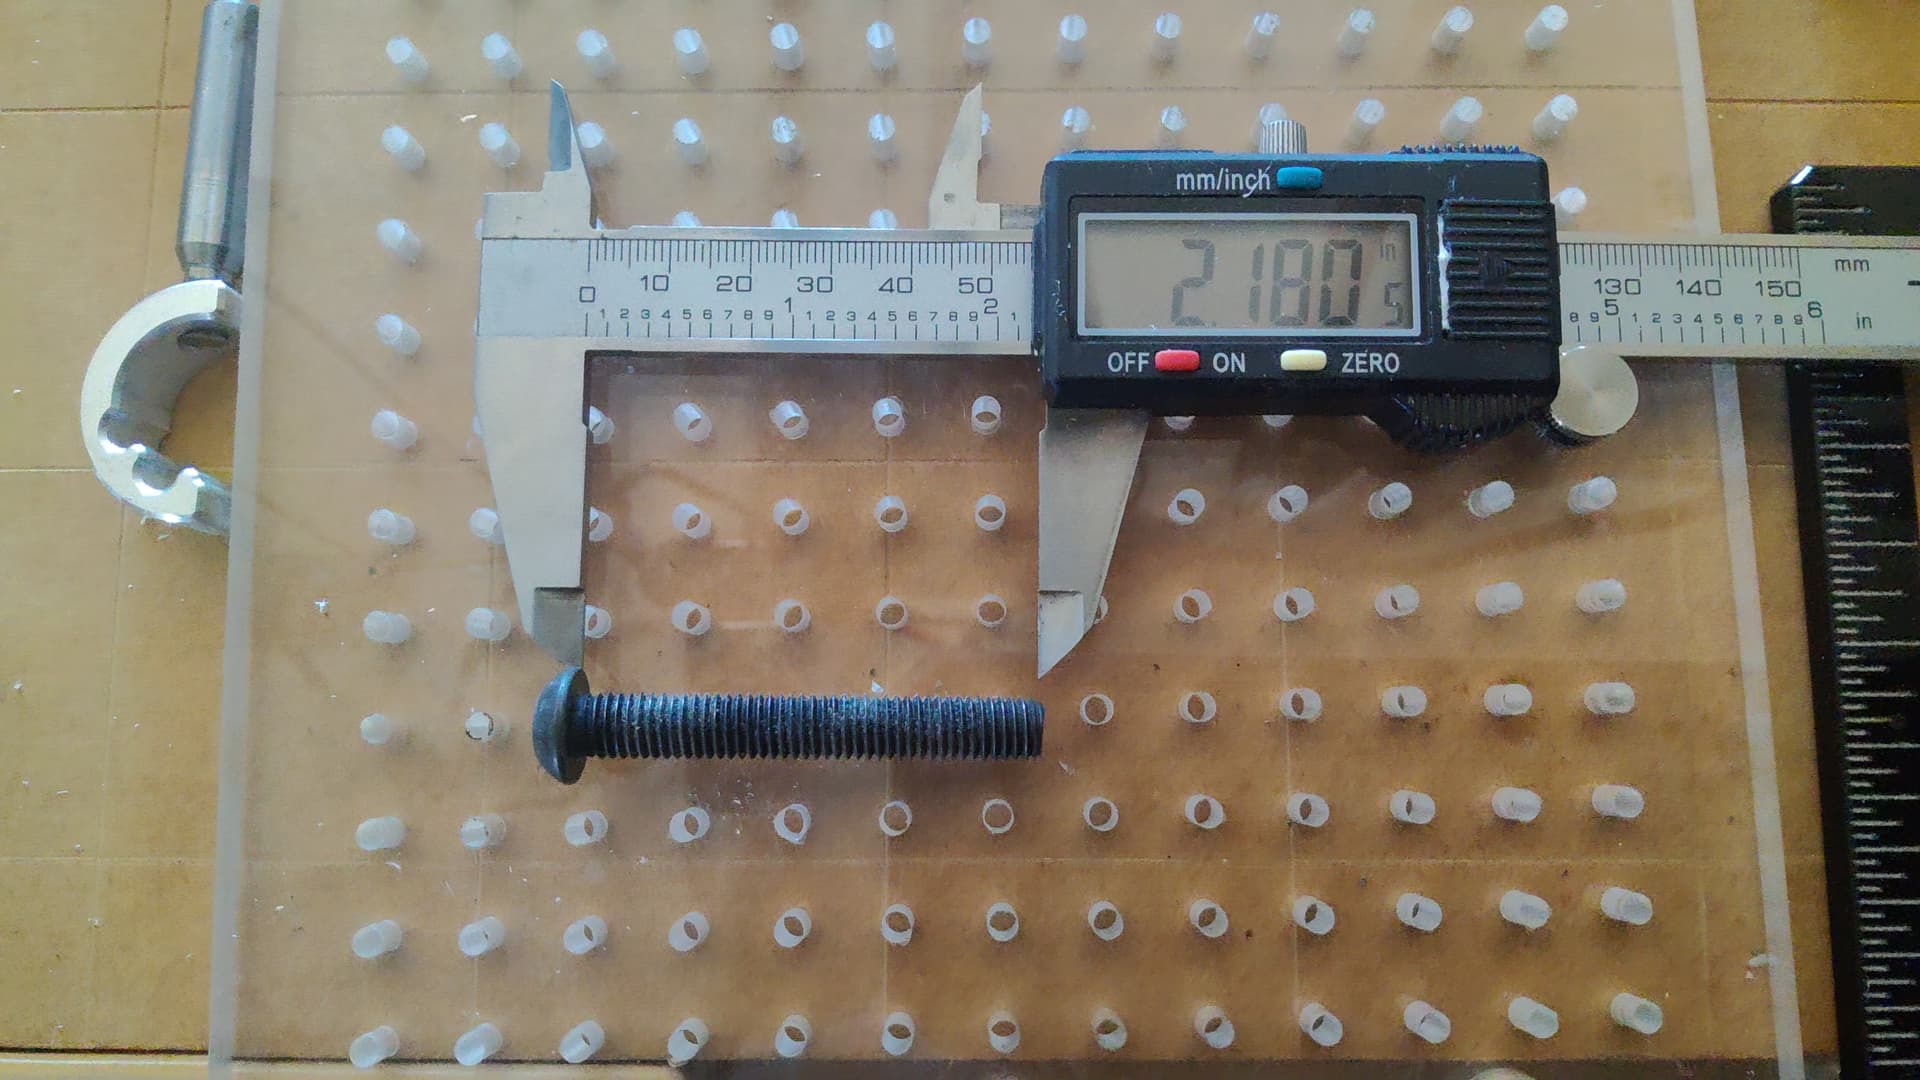
As far as I can tell my machine did not come with any M8 bolts for the spoil board. The manual doesn’t give a length, and since the holes don’t seem to be tapped through the length is critical. Can anyone give me a McMaster part # or spec for what I should get here? I’m going to be using 18mm MDF so would want something that works well with that.