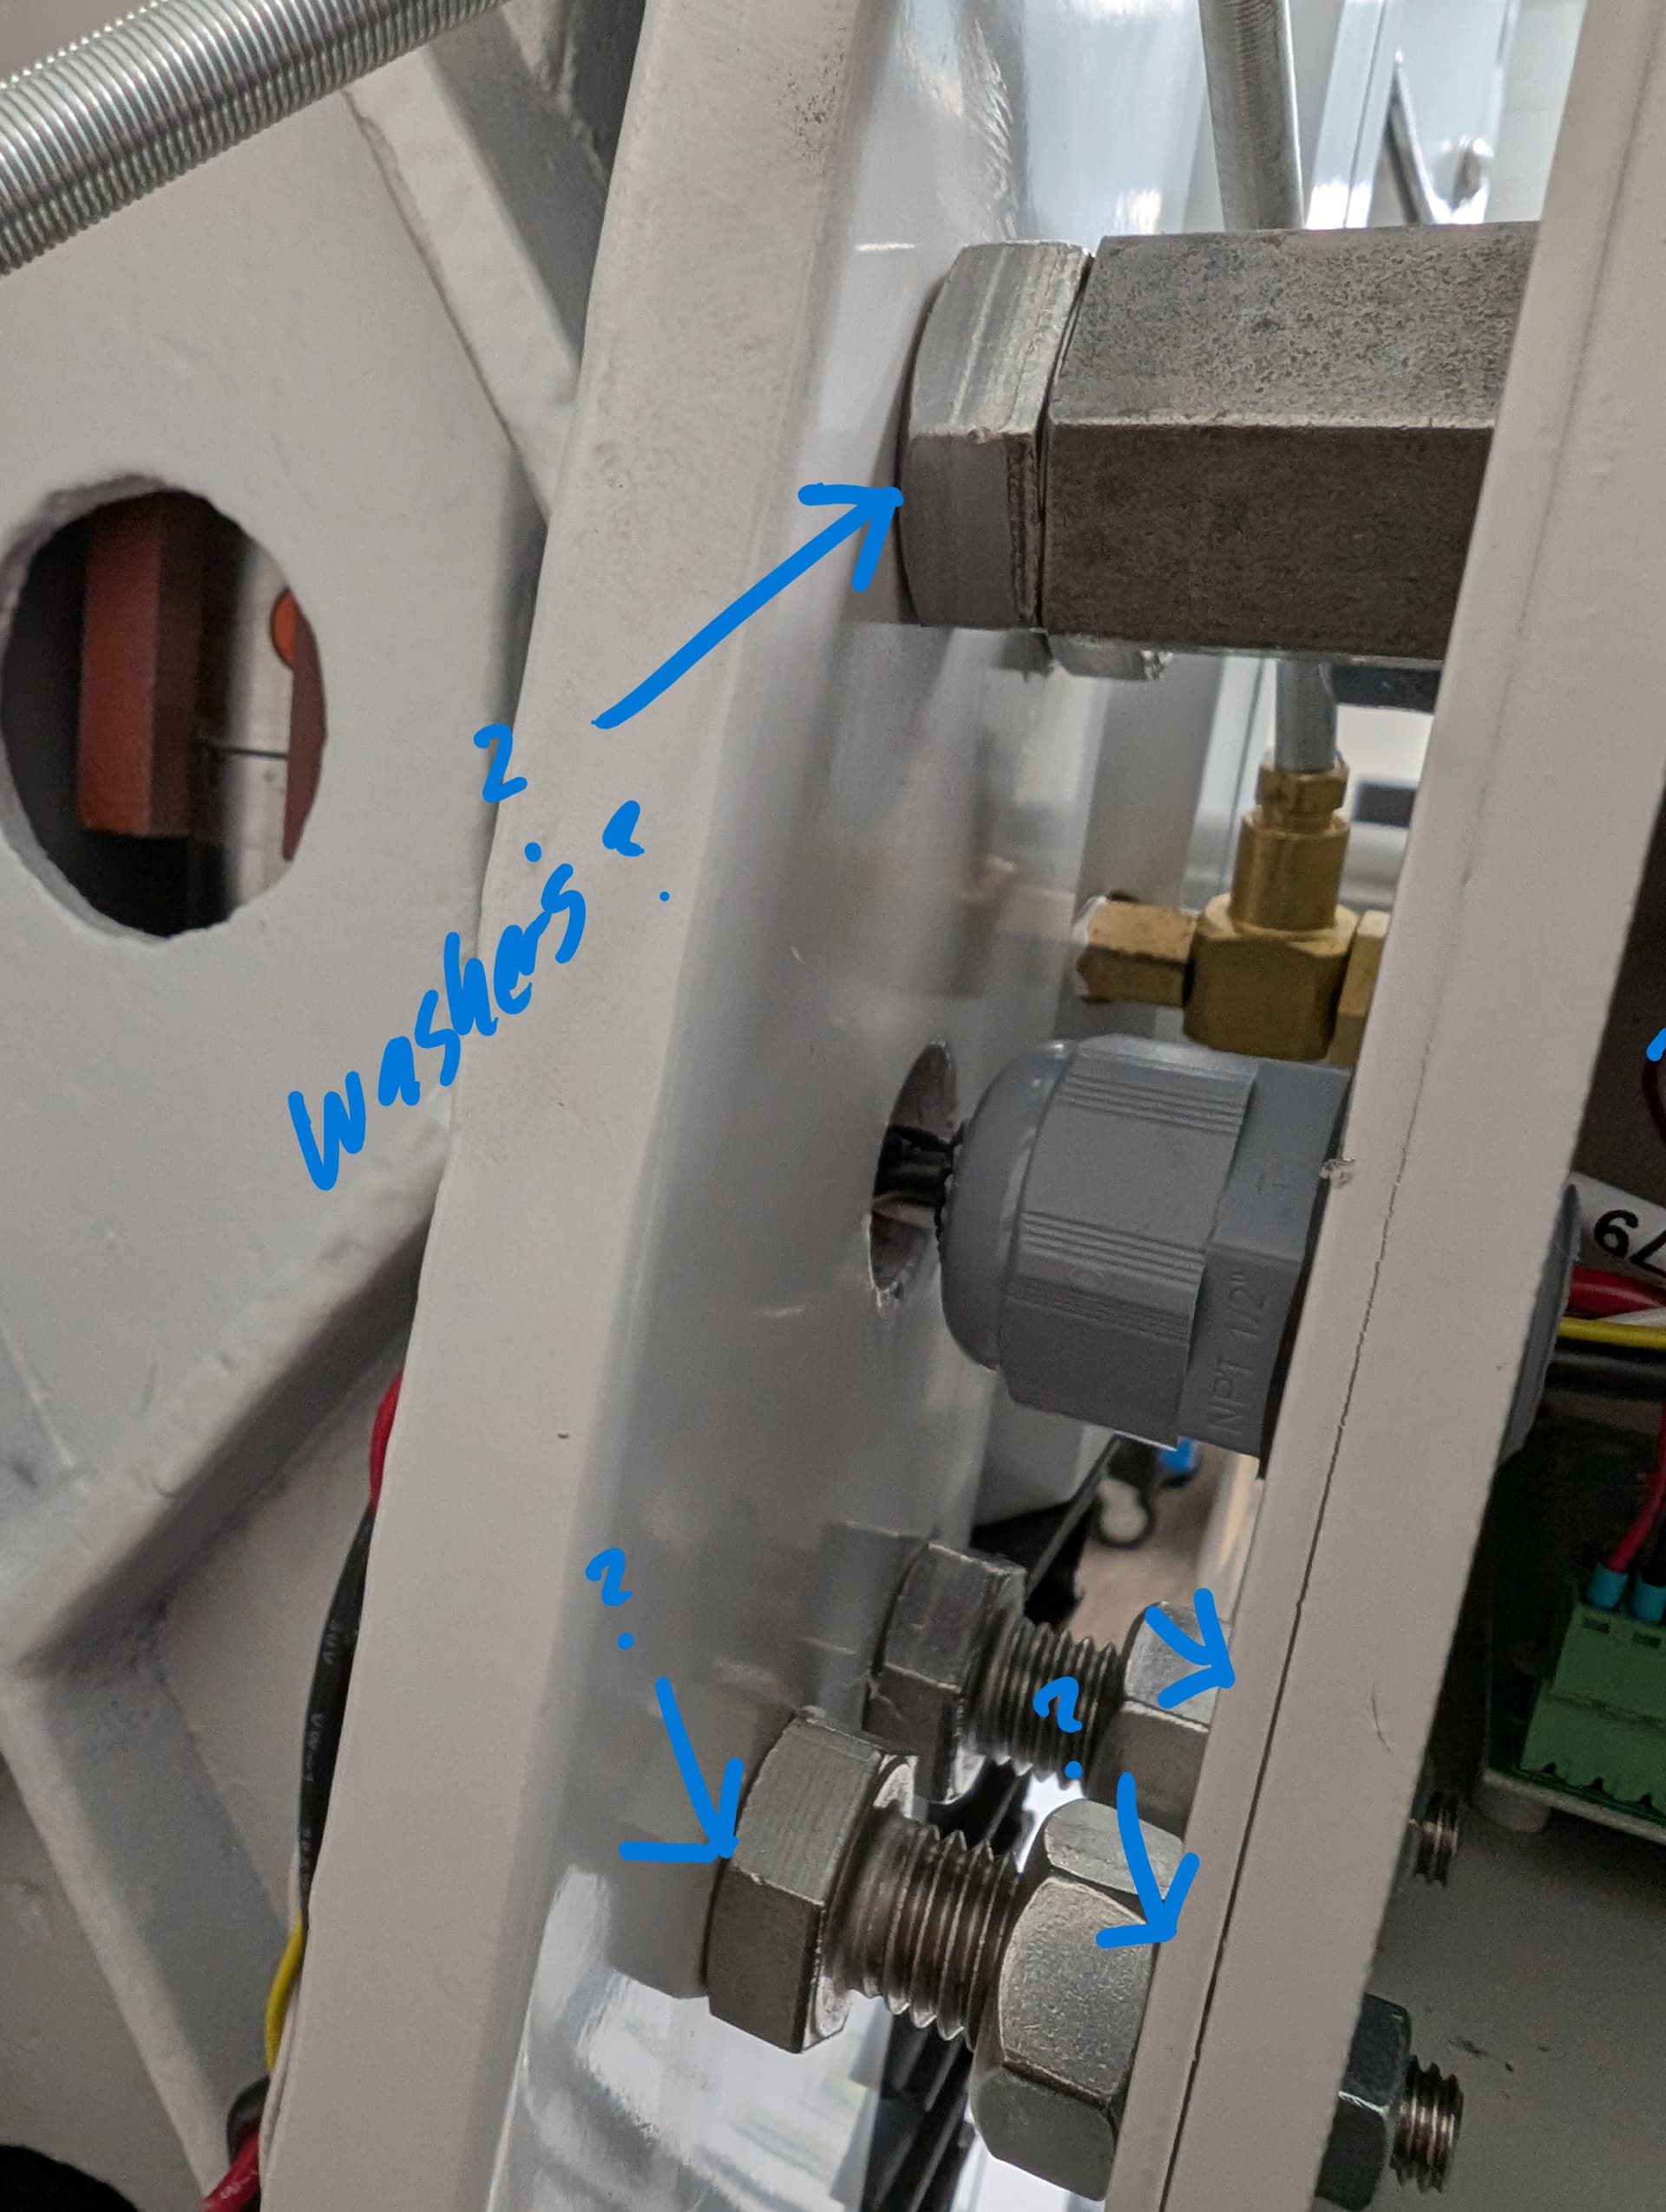
Is there supposed to washers between the Z-column and the standoffs? There were some extra washers included with the standoffs, but the ATC instructions aren’t very clear about using them or not.
There isn’t enough clearance between the ATC and the mill spindle head, and there isn’t enough space to retract the ATC assembly on the linear rail via the coupler. I’ve seen previous comments or YT videos talking about this.
Clint,
The quick answer to your question is; no, there should not be washers between the standoffs and the column. A longer answer is that the larger washers are used between the standoffs and the ATC cabinet, except for on the “Tilt” standoff, which has an eccentric end that fits into the slot on the cabinet. It’s best to initially set the length of the adjustable standoffs (with the large washer on) to be the same length as the Tilt standoff (face to face not including the eccentric). That way the cabinet sits the same distance off the column at all four points. There should be between 2mm and 5mm clearance between the ATC motor box and the Z axis casting when the ATC is at full extension. If not, you need to lengthen the two forward standoffs, which will back the ATC off. It pivots off the two rear standoffs so a small change in the length of the two forward standoffs will result in a significant move of the ATC at the spindle. If that move causes the cutout in the shroud for the spindle to misalign forward or back, you may have to move the ATC forward or back on the slotted holes in the cabinet for the standoffs. Give that a try. - Craig
I have a slightly different issue. I too was confused by the washers. As it comes with 3 large ones, and 3 small ones. The video doesnt specify which go where between the standoffs and the atc so i ASSUMED you use the 3 large ones under the nuts on the fixed and 2 adjustable standoffs. And the video says “except for the tilt standoff THAT USES 2” well ok, i have 0 large ones left, so that must mean it uses 2 of the smaller ones. I then lined and leveled the ATC, its the proper distance from the spindle, its aligned with the spindle…..but it sits WAY too low. Instead of the atc fork grabbing around the collar of the tool to be changed, per design, it just slams into the side of the tool around the height of the set screw. Thats almost an INCH low. Ive tried losening all 4 mounts and pushing the atc as far UP as it will go and it still sits too low. Pretty confused. So far every addon has been easy, but this atc has taken me hours and im still no further along.
Kyle, I’m not in front of a 440 at the moment but wanted to offer you something on case you are working on this today. You adjust the height of the tool change after you have installed the ATC. There is a section on page 71 of the manual.
I realized my mistake about 30 min after making the post. So part of it was the fact that I have zero CNC experience and had I just thought about it for 30 seconds critically I would have realized I was being a retard. The ATC doesnt account for Z, the MILL does. My biggest difficulty was due to actually listening to the instructions. Not sure about the “revised” ones yall mentioned, but what came with my brand new 2026 mill told me specific things. First was, setting the standoffs to the fixed one. Well, when I got mine, the fixed one was NOT locktighted and set. Which “and i realized this after” made me set the adjustable ones too far in to match it. Which was making the atc way too close to the machine. Especially because the atcs adjustment in and out using the lock nut on the piston is fine if you are too far from the machine, but comes bottomed out if you are too close. So I skipped all the bullshit unhelpful instructions, tightened down the only one that has a fixed size, the tilt nut. Then used a wood wedge between the body of the mill, and the atc allowing me to stand in front of it and tap up to move it in and out and it took me LITERALLY 30 seconds to get the entire thing in the perfect position. Then i spun the standoff nuts to meet the atc body, then tightened it from the inside so it wouldnt move. Prior to that, i fought the damn thing for like 3 hours as it would always hit the lip of the carasel on the spindle collar, or would be too close, too far away, at a goofy angle or some other nonsense. If you dont have 2 people, you cant do it the “instructions” way. So lesson learned for anyone in the future reading this. Save yourself the trouble, think outside the box. After using the wedges, it was as simple as doing the ++ - - procedure and the tool was perfectly aligned. One thing that would also aleviate all the stress on the owner, tormach could have just made the atc body standoffs non adjustable with a fixed distance, then make the ram itself fully adjustable in the X/y/z axis to compensate. Would take a 3 hour install and turn it into 30 minutes. Its not like the castings of the 440 mill itself are different from one another dimensionally. Off topic gripe, for those of us who bought a fully maxed machine, the instructions are not helpful. It says what order you should install stuff. But as you follow those instructions, you install one thing. To then mostly disassemble what you just installed, to install the next thing. It needs to be broken into sections. If you bought a base machine ho to page 1. If you got a base machine with a power drawbar. Page 5. If you got a base machine with power drawbar and atc page 12 etc etc. Theres not really very many configurations overall. I probably increased my install time by 25% simply undoing work, not knowing. Not everyone buying these know or understand a cnc machine. So for example, you just installed your power drawbar. Cool. Looks good. Functions great. Very pleased with yourself. And next steps the atc…… well shit. Time to take apart the manifold and manual button assembly you just spent half an hour putting on. Because not one person would know by default “if im going to install an atc, im not going to need this” i plan on making a youtube video tutorial on how to do the entire machine with each and every accessory so others dont have to deal with the frustration. Tech supports been super helpful btw. Tormachs really responsive. But theres a lot of assumptions in ownership that you already know what your doing.
If you dont have 2 people, you cant do it the “instructions” way
I got mine already installed, but in taking it apart to re-align it, I could definitely see that it would be an uphill battle to try and install and lift that into place all by myself. They likely want two bodies because of safety and having done it enough times that they found it not to be reasonable/product liability/lawyers/etc.
Going through EMT training (I was volunteer for a while) I learned you need three people to transport a person up/down stairs and specialized equipment for that (stair chair, two on the chair and a third as safety to guide the team of two)…the older I get, the more I tend to ask for help instead of trying to cowboy stuff. I can recall too many near misses and upon reflection, realize how bad things could go.
The way I understand, if you try to combine all the things, you lose the notion of complete one module and function test that item. If I had to commission one from scratch, knowing what I know having taken most of it apart at one point or another, I would have reviewed all the instructions before doing the install and with modern tools, I would feed all the instruction PDFs into ChatGPT and ask it to figure out what overlaps/what are prerequisites and have it assemble custom instructions for the specific accessories that I ordered…