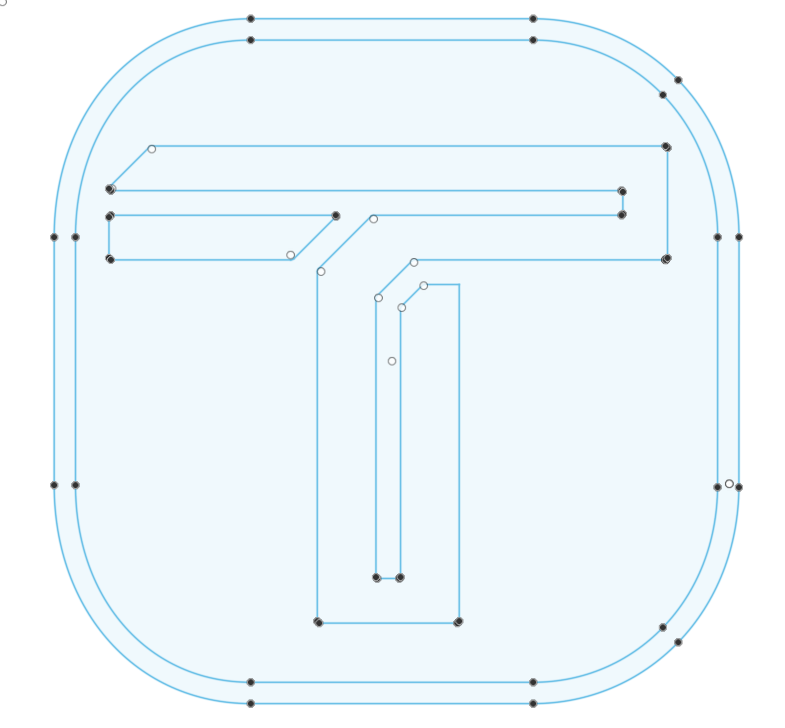
There have been a few times when working on an engraving piece where I wanted to add some shading that wasn’t in the original art. On a recent project at home I figured a few things out and want to share with you what I learned. For this purpose I am using the Tormach logo:
Before I go too far, I would like to shout out to NYC CNC for their video on engraving that got me started several years ago. Engraving Tools: Speeds, Feeds, and Tips! | WW237
For this engraving I used the Lakeshore Carbide 0.02 ball engraver.
CAM Notes
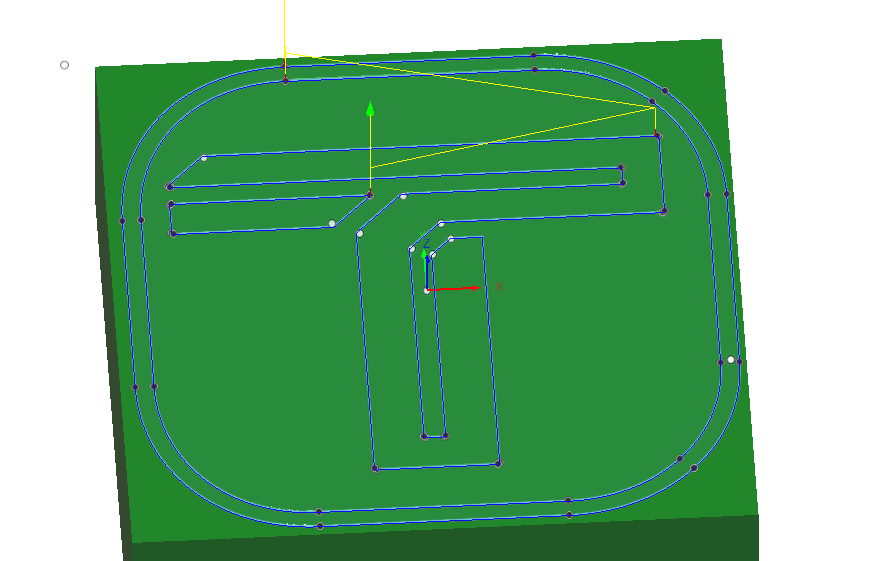
Note that I am using Fusion360 but I expect a similar workflow to work on your CAM platform of choice.
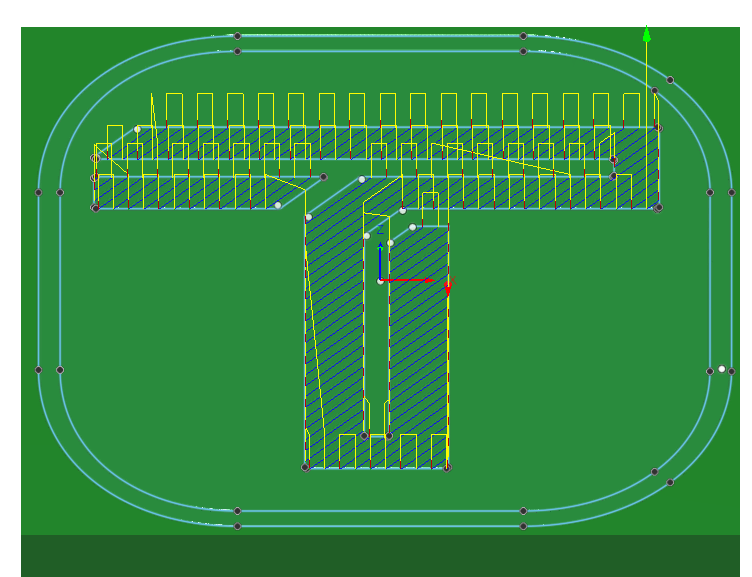
Now as you can tell in the original artwork there are is no shading or hashed lines, which is something I wanted to add in order to make this engraving pop.
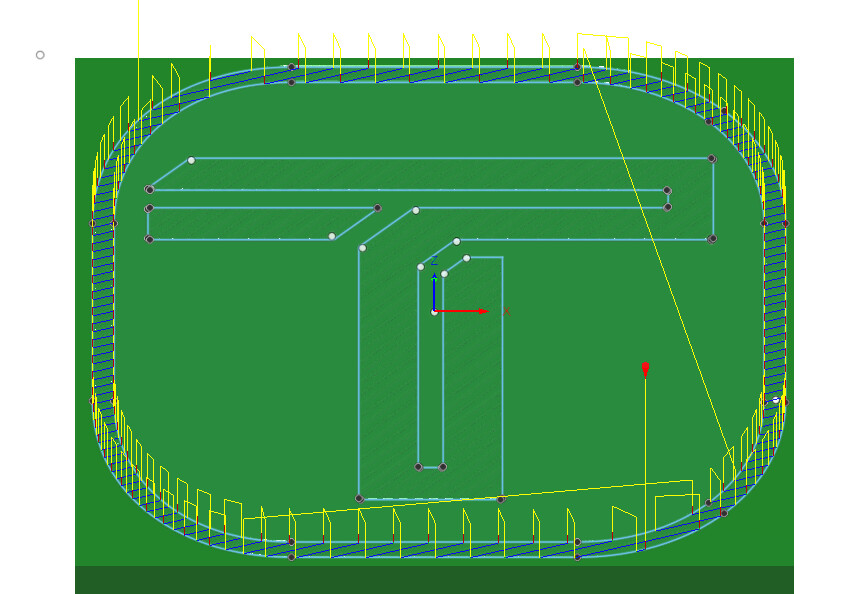
- The first step in this process was to use the Trace tool path to follow the lines in the sketch. The only thing special that I did here is set the “Axial Stock to Leave” to -0.005"
- Next I wanted to fill in the sections of the T with diagonal lines. In order to accomplish this I used the Parallel tool path with a few key factors.
- Stepover = 0.045" - Naturally CAM complained that the step over was wider than the tool but I just ignored that. Set this value to whatever makes sense for your project.
- Pass Direction = 45 degrees. This was an artistic choice to make the lines diagonal.
- For Machining Boundary I selected the sections of the T that I wanted to engrave.
- Under Tool Containment select “Tool Center on Boundary” then add an additional -0.003" offset. This last part will keep the outside shape of the T in good working order.
- For the outside border I didn’t like the way that the 45 degree lines looked so I changed the pass direction to 18 degrees.
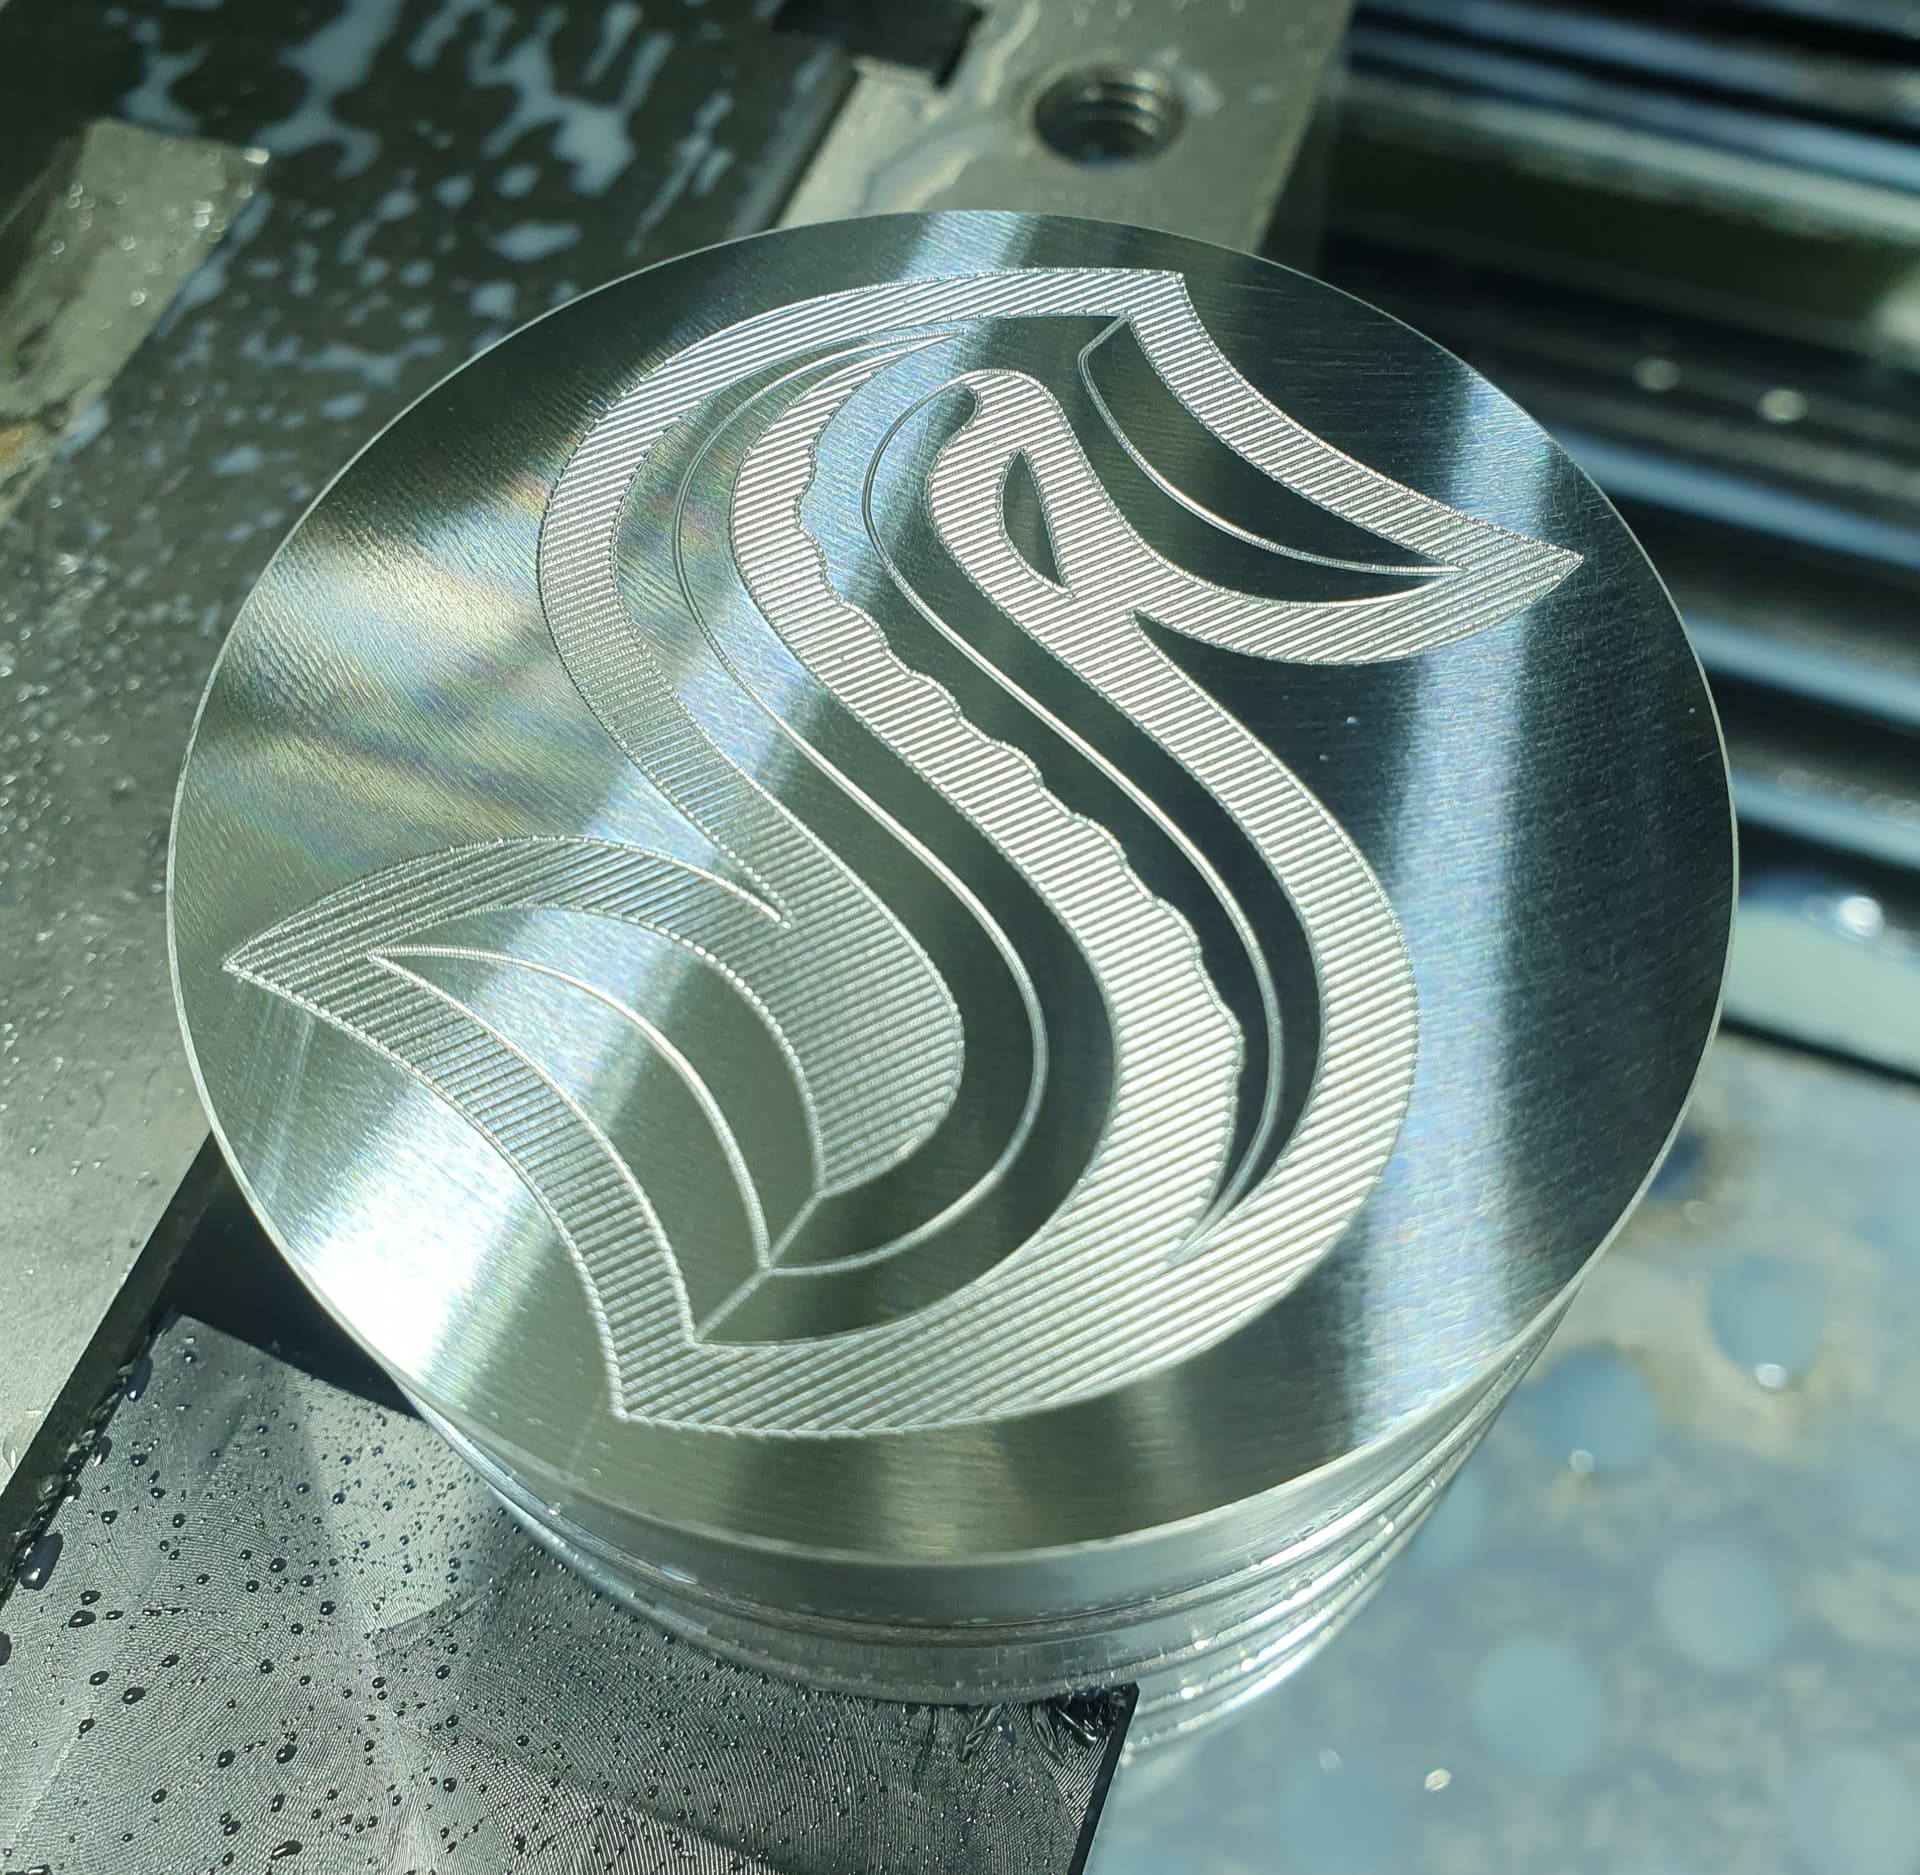
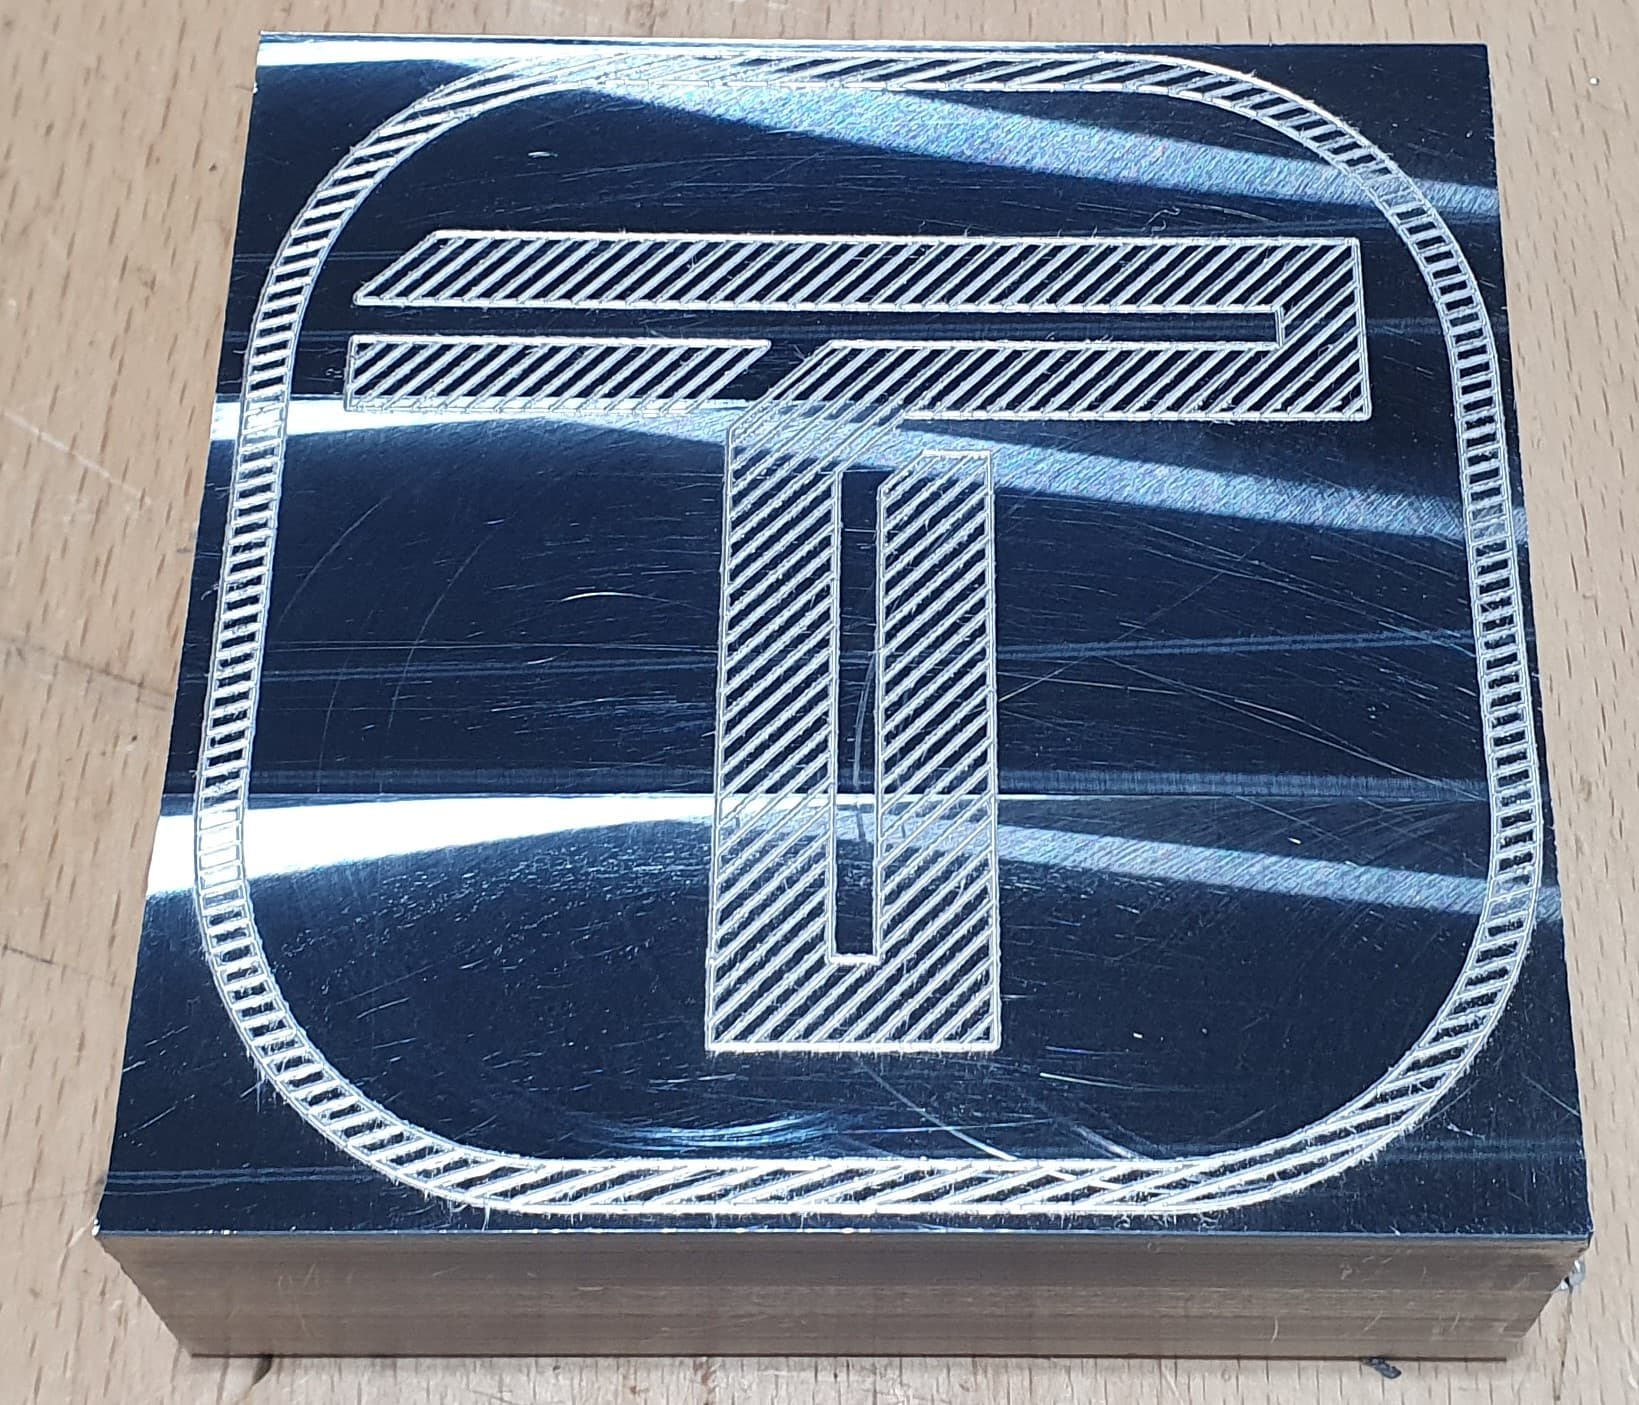
Here is the final engraving: (I scuffed it up a little trying to polish it for you all)
The original project that provoked me figuring this out is this engraving.